How to draw a whale — easy step by step drawing ideas
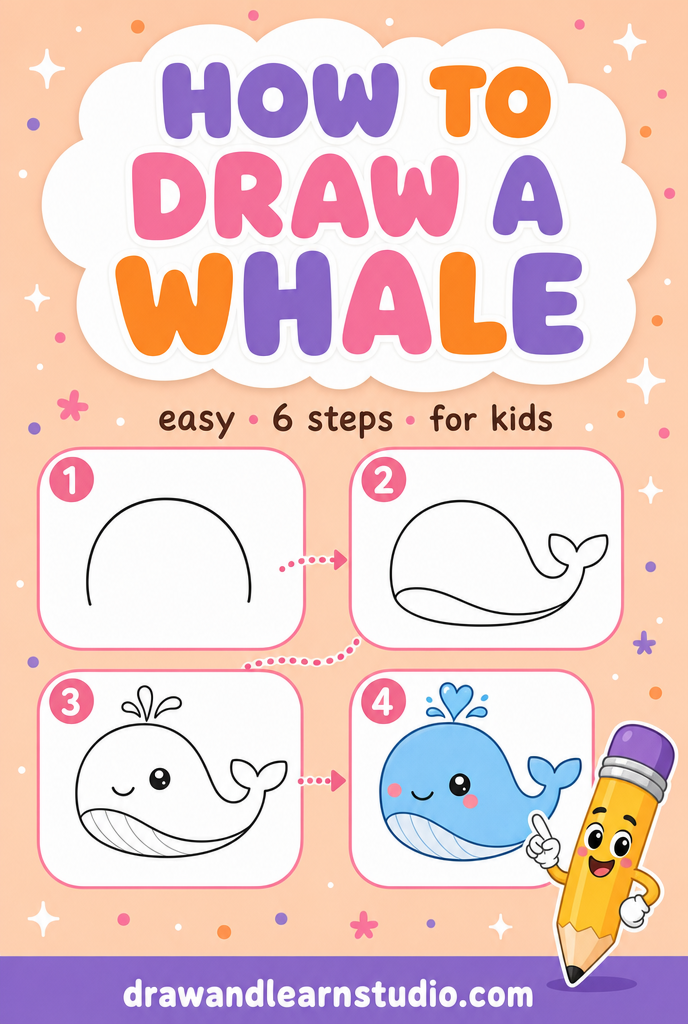
If you're searching for whale drawing ideas that a five-year-old and a total-beginner grown-up can both finish with a smile, welcome aboard. Teaching how to draw a whale is one of the great joys of my studio table, because a whale is secretly the friendliest shape in the ocean: one big smooth hill, one happy tail, and a fountain on top like a party hat.
Here's my promise: by the end of this tutorial you'll have a genuinely adorable whale gliding across your paper, built from curves so simple you can draw them with your eyes closed (please keep them open, though — it's more fun to watch). No art degree, no fancy supplies, no pressure. One small step at a time.
Whales are also wonderfully forgiving. There are no tricky legs, no fiddly paws, no whiskers to place — just big, generous curves that flow into each other. If you can draw a rainbow, you can draw a whale. Let's prove it.
⏱️ Time: 15–20 minutes
⭐ Difficulty: beginner — great for kids 5+
✏️ Materials: pencil, eraser, paper, blue and cream crayons or markers
Whale drawing ideas: the 6 easy steps
Step 1 — Draw the body
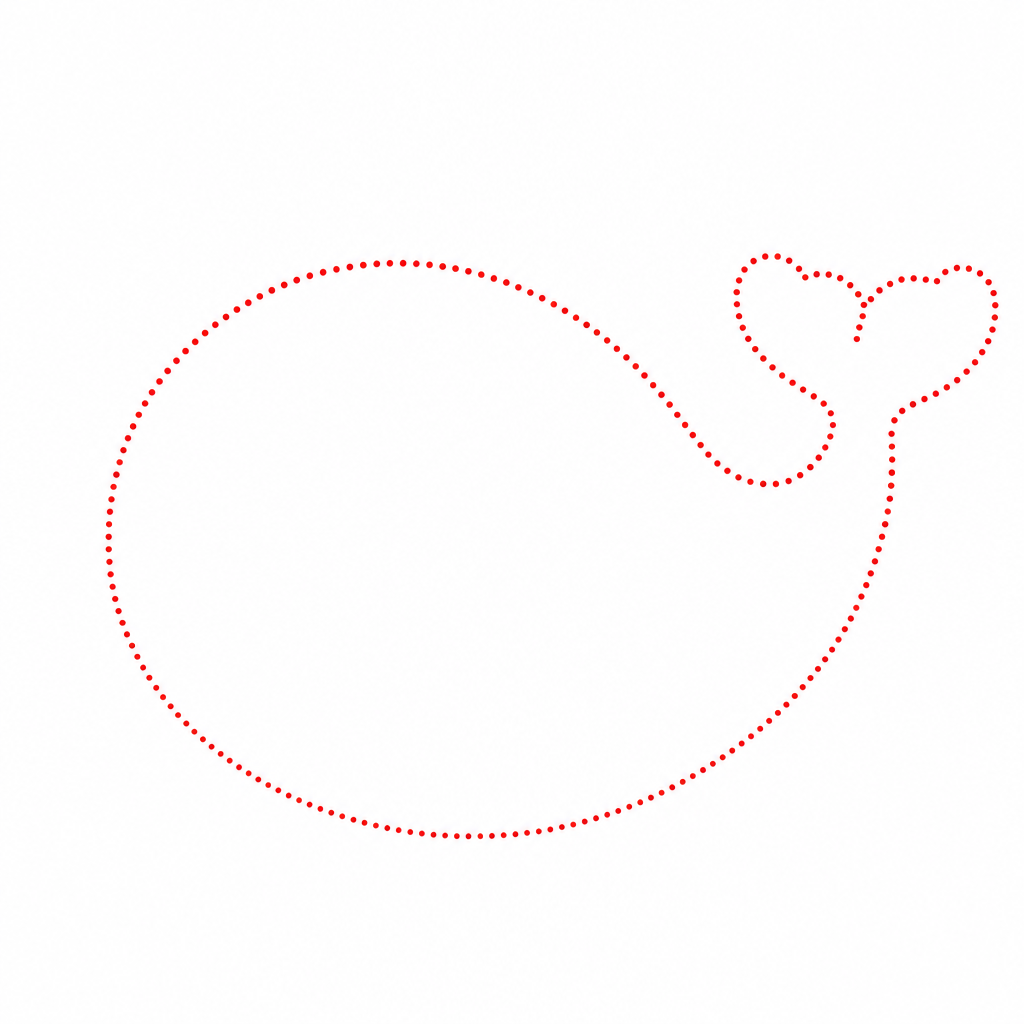
Start with a big, smooth hill shape that leans across your paper — high and round on the left where the head will be, sloping gently down toward the right where the tail will go. Think of the curve a rollercoaster makes, or a wave rolling toward the beach. Press lightly; these first lines are scaffolding and a few of them will be erased later.
Be generous with the size. A whale is the biggest animal that has ever lived, and even a cartoon whale deserves some room to swim. Fill most of the paper's width, and leave a little space above the head for the spout and below for the belly.
Step 2 — Add the belly line
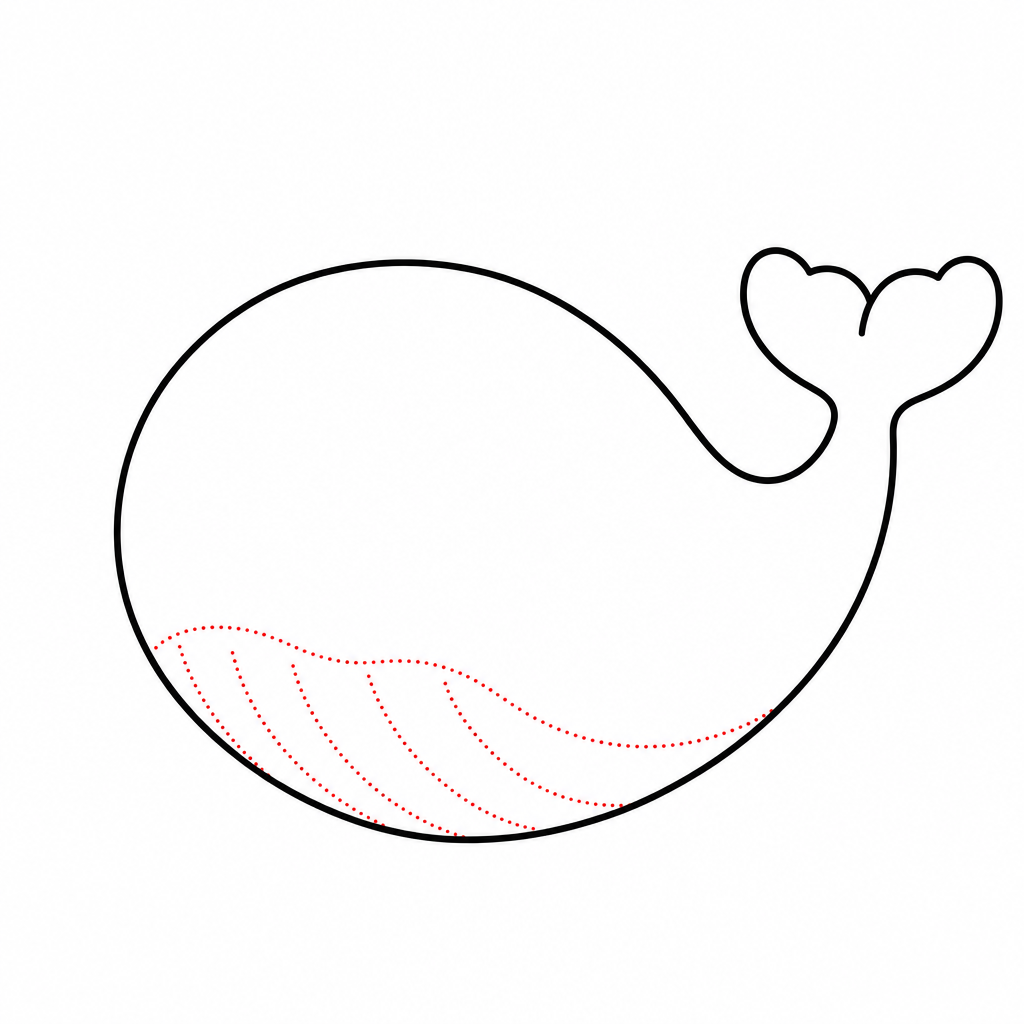
Close the bottom of your whale with a long, gentle curve running from under the chin back toward the tail end. Now your whale has a complete body — like a giant, happy bean. Don't make the bottom perfectly straight; a slight downward bulge makes the whale look pleasantly full, like it just had a very good lunch of krill.
Then add the whale's signature detail: two or three long, slightly curved lines running along the front of the belly, following the bottom curve. These are the belly grooves that real whales have, and drawing just a few of them instantly makes your cartoon read as "whale" instead of "blue blob."
Step 3 — Draw the tail
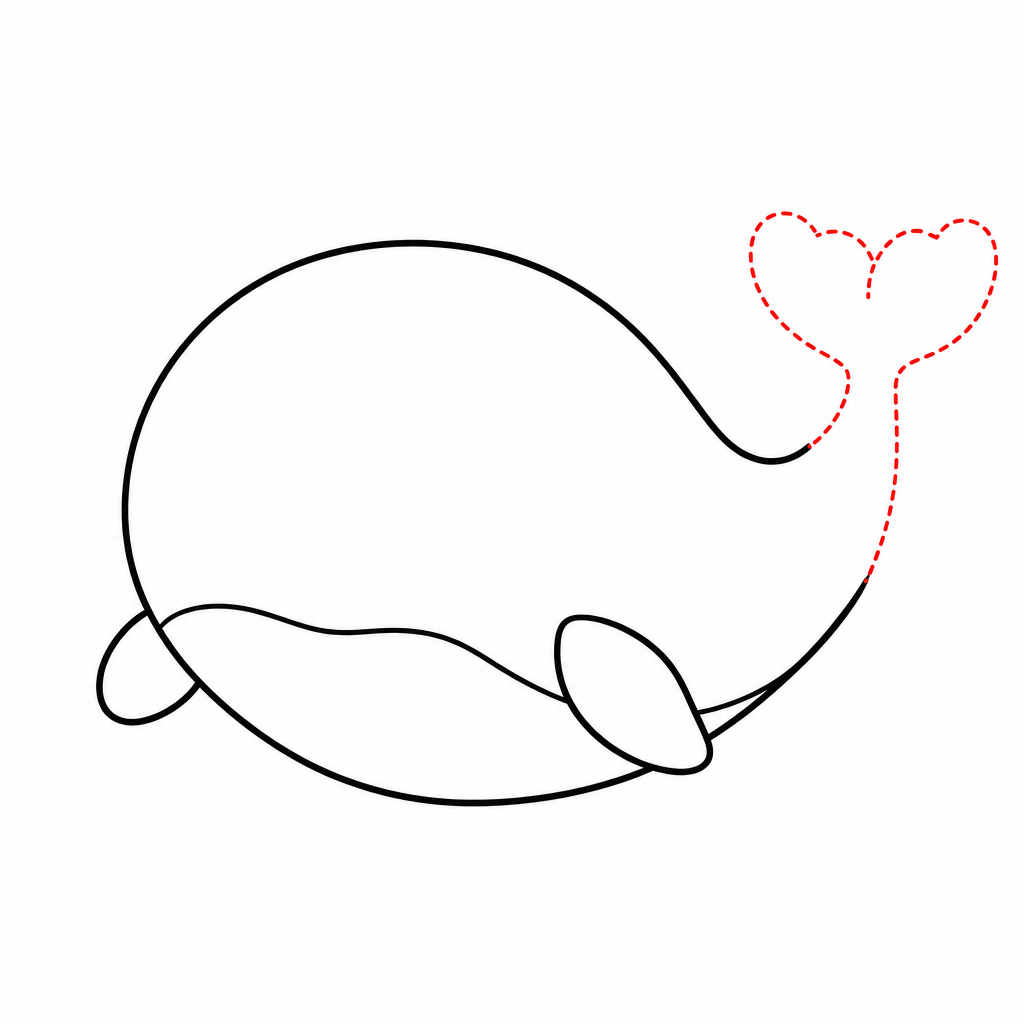
At the narrow end of the body, sweep the top and bottom lines toward each other so the body tapers into a tail stem, then add the flukes: two rounded triangle shapes spreading out like a bird in flight. Here's the detail that fools everyone — whale tails are horizontal, not vertical like a fish's. Draw the flukes lifting up and out, like a waving hand saying hello.
Give the tail a happy little upward curl. A tail that flips up adds instant personality and motion, as if your whale just did a cheerful splash. Keep both flukes roughly the same size, but don't stress about perfect symmetry — waves wobble, and so do tails.
Step 4 — Add the flipper and spout
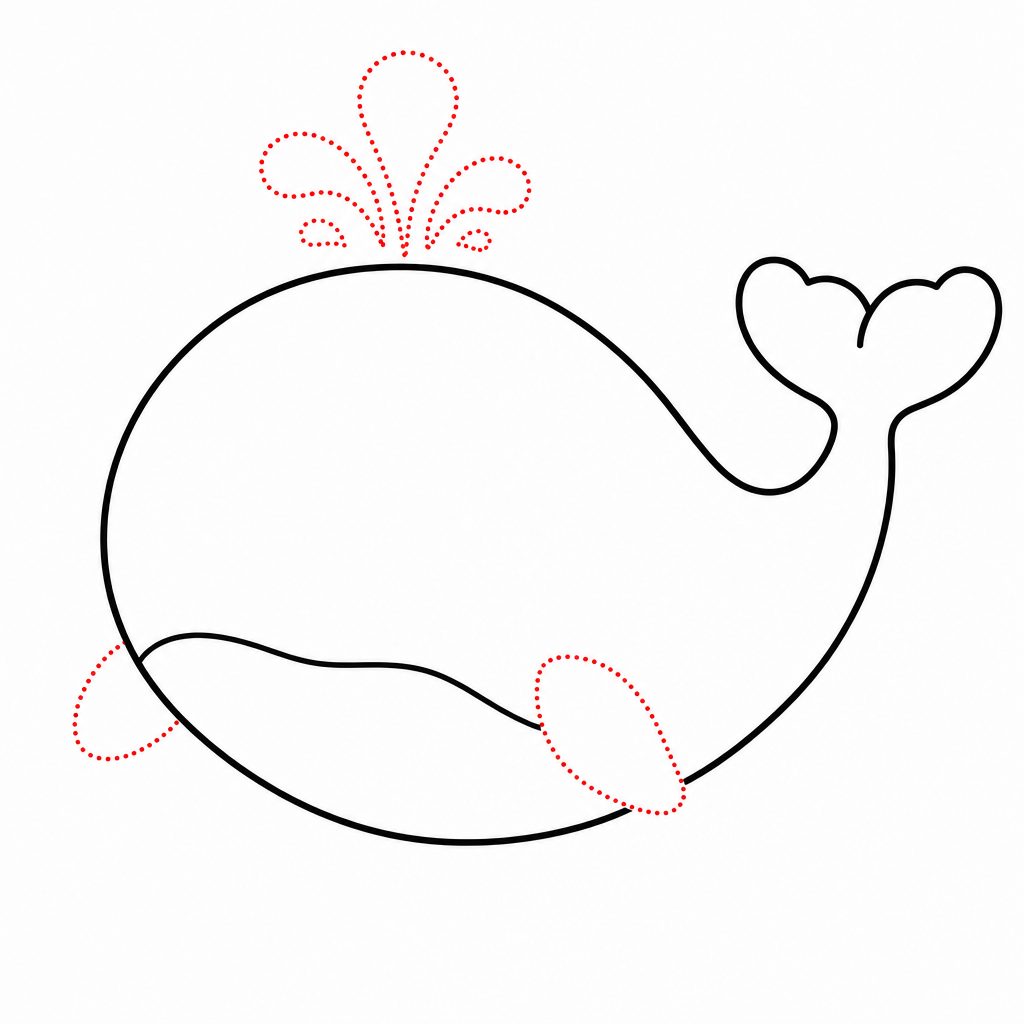
On the side of the body, below and behind the head, draw one small teardrop-shaped flipper pointing down and back. One flipper is all you need in a side view — its twin is hiding on the far side of the whale. Keep it small; oversized flippers turn your gentle giant into a confused penguin.
Now the crown jewel: the spout. Draw a short stem rising from the top of the head, then two or three curved arcs fanning out from its tip, like a tiny palm tree or a firework made of water. A few small droplets around it complete the effect. This little fountain is pure cartoon joy — no whale drawing feels finished without it.
Step 5 — Give it a face
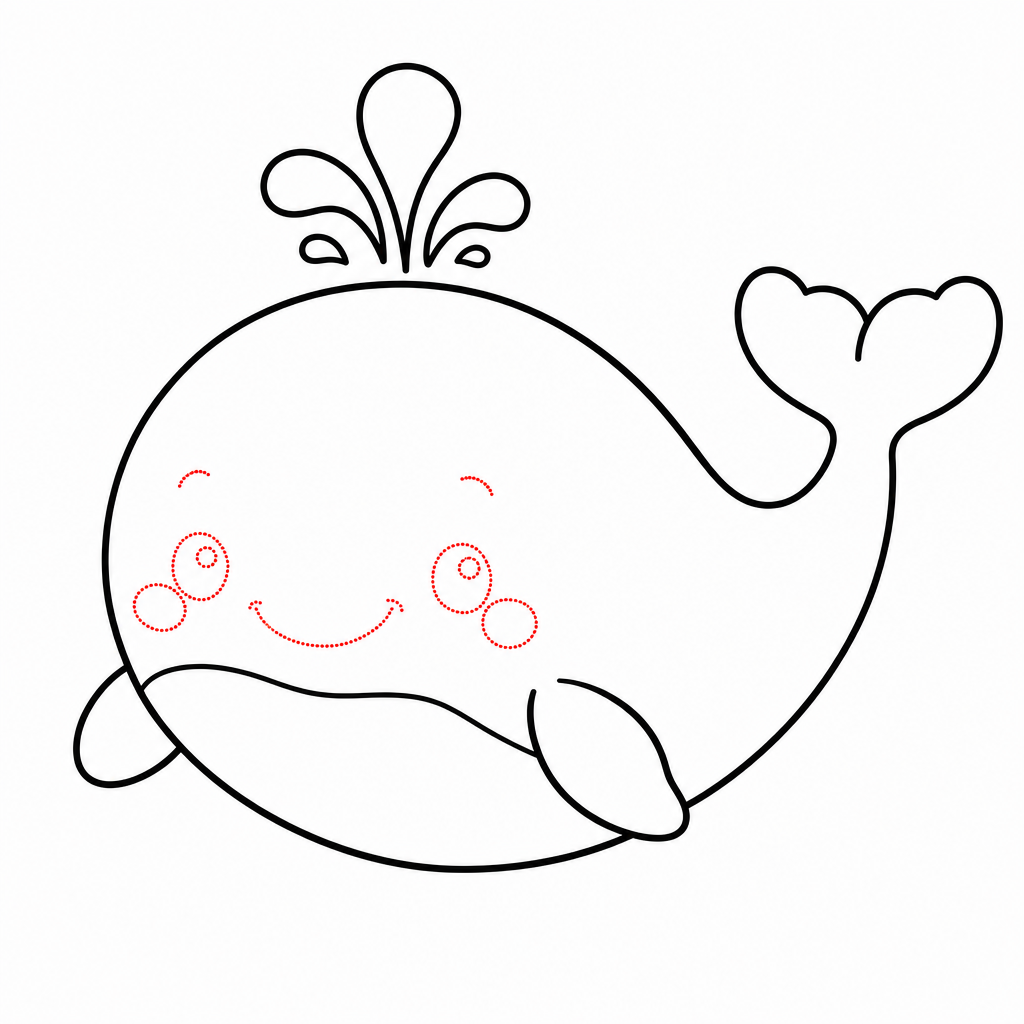
Draw one big round eye on the head, placed low and quite far forward — closer to the chin than to the top. Fill it in dark, but leave a small white circle uncolored inside for sparkle. That tiny highlight is the single easiest way to make your whale look alive and friendly instead of sleepy.
Then add the smile: one long, curved line starting near the front of the face and sweeping back and up. Whales have wonderfully wide mouths, so be brave and make the smile big. Finish with a rosy blush circle on the cheek — officially optional, secretly essential.
Step 6 — Finish and color
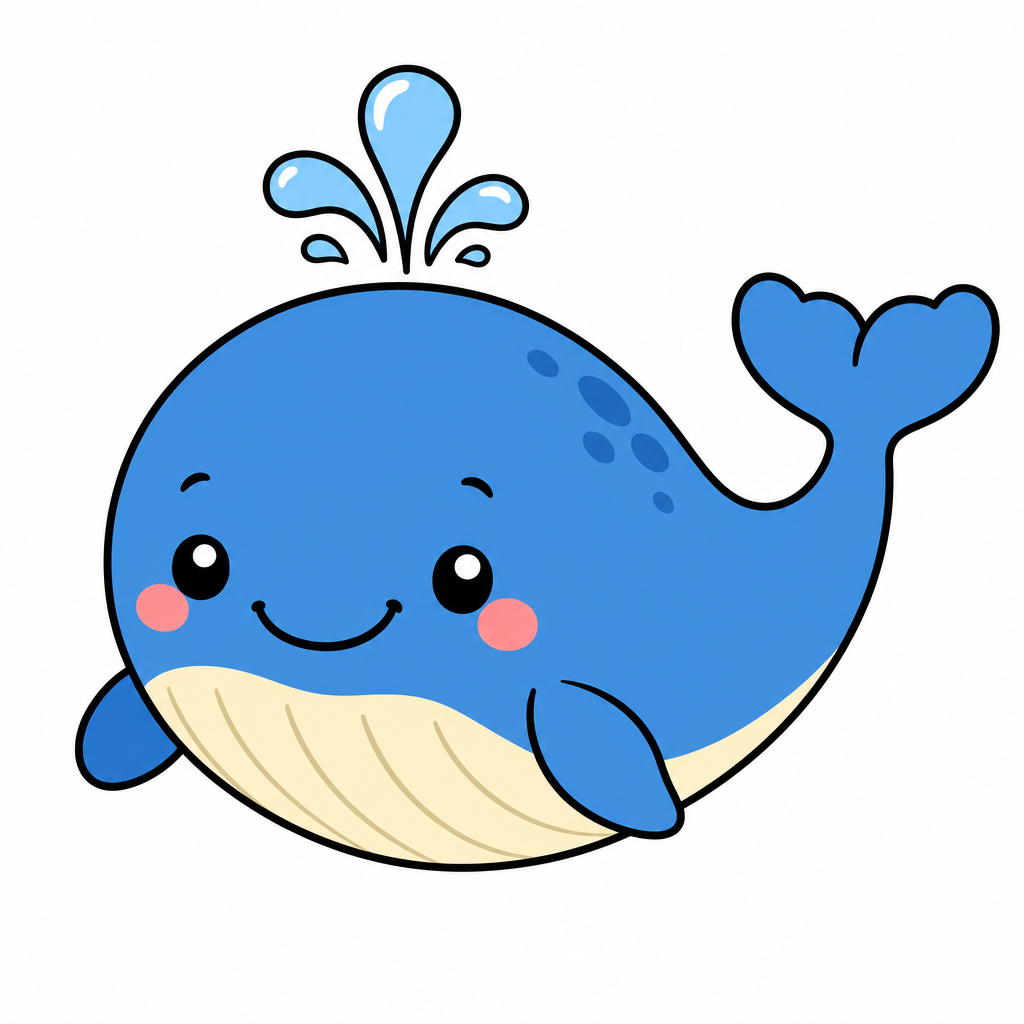
Trace over your favorite lines with darker pencil pressure or a fine marker, then gently erase the leftover construction lines — the old hill curve under the tail, the hidden V in the flukes. Watch your whale surface cleanly from the pencil fog. This cleanup moment is the most satisfying part of the whole drawing.
Then color! The classic look is soft sky-blue on top with a cream or pale-gray belly below the groove lines, plus a pink blush cheek. But your ocean, your rules: a mint-green whale, a purple whale with stars on its back, or a sunset-orange whale are all masterpieces. Add a few bubbles, a wavy water line, or a tiny fish friend to complete the scene.
Common mistakes to avoid
Drawing the tail like a fish
This is the classic whale mix-up. Fish tails stand vertical like a sailboat sail; whale tails spread horizontal like airplane wings. If your whale looks suspiciously like a giant goldfish, the tail is almost certainly the reason.
The fix is quick: erase the tail, draw the little V skeleton horizontally, and wrap two rounded flukes around it so they lift up and out. Horizontal flukes plus a spout equals unmistakably whale.
Making the eye too big or too high
Whale eyes are proportionally tiny and sit low on the enormous head — close to the mouth line, far from the top. An eye drawn huge and high turns the whale's calm charm into cartoon panic.
Keep the eye modest — much smaller than you'd draw for a kitten — and tuck it down near the smile. Low and small reads as gentle and wise, which is exactly the whale energy we want.
Pressing too hard too early
The whale's beauty is its smooth, flowing outline, and smooth outlines need light drafting. Heavy early lines can't be erased cleanly, and the tail area especially needs the original body curve to disappear underneath it.
Keep steps 1–4 whisper-light, then commit with confident dark strokes in step 6 once you know which curves are the keepers. Light lines are drafts; dark lines are decisions.
Troubleshooting
"My whale looks like a submarine"
Too many straight lines. Erase the flattest sections and redraw them with gentle bulges — the back rounder, the belly fuller. Then add the blush cheek and upturned smile. Machines are straight; whales are curvy and delighted.
"The spout looks like antlers"
The arcs are probably too tall and too stiff. Shorten the stem, curve the arcs outward like a fountain rather than upward like branches, and add two or three small droplets around the tips. Water splashes out and falls; antlers just stand there.
"My curves are wobbly"
Draw faster! Slow, careful strokes wobble more because your hand micro-corrects the whole way. A quick, confident sweep from the elbow comes out smoother. And remember the professional secret: draw every curve lightly two or three times and simply keep the best one.
Key takeaways
- A whale is one big hill, one belly curve and a waving tail — if you can draw a rainbow, you can draw a whale.
- Whale tails are horizontal with two rounded flukes lifting up — that's the number one "whale, not fish" signal.
- The spout is a tiny water palm tree on the head: short stem, curved arcs, a few droplets.
- Keep the eye small and low with a white sparkle; keep the smile long and upturned.
- Draw light until step 6 so the scaffolding erases cleanly from under your final curves.
- Belly groove lines take five seconds and do half the work of making it look like a real whale.
FAQ
What age is this whale drawing tutorial for? It's perfect for kids 5 and up with a little help, and children 7+ can usually follow all six steps independently. The big smooth curves also make it one of the best first drawings for beginner adults.
How do I make the water spout look right? Draw a short stem rising from the head, then two or three curved arcs splashing outward like a tiny palm tree made of water. Keep it small — a giant spout overwhelms the face.
What materials do we need? Just a pencil, an eraser and paper. Blue and cream crayons make the final step extra satisfying, but a pencil-only whale is still a wonderful whale.
My whale looks like a fish. What went wrong? Check the tail: fish tails are vertical, whale tails are horizontal with two rounded flukes lifting up like a waving hand. Adding the spout and belly lines also instantly says "whale."
Keep drawing! 🐋
If your young artist is hooked, our step-by-step drawing book is the top pick in our studio — 320 animals taught in the same easy 6-step style as this tutorial. Pair it with a chunky set of washable markers and a spiral sketchpad (spiral bindings lie flat, which little hands love), and quiet afternoons take care of themselves.
Get the book on AmazonYou did it! One rolling hill, one waving tail and a fountain later, there's a whale beaming up at you from the page. Stick it on the fridge, give it a bubble trail tomorrow, and remember: every artist you've ever admired started exactly like this — one happy, curvy whale at a time.
More tutorials: All tutorials · How to draw a dolphin · How to draw a hedgehog · How to draw a lion