How to draw a penguin — easy step by step drawing ideas
If you're hunting for penguin drawing ideas, you've waddled to exactly the right place. Learning how to draw a penguin is one of the friendliest lessons in our whole studio, because a penguin is basically a smiling egg in a tuxedo — one big soft shape, two little flippers, and a pair of orange feet that refuse to be taken seriously. No tricky legs, no complicated fur, no wings that actually have to look like wings.
Here's my promise: by the end of this tutorial you'll have a genuinely huggable penguin built from simple shapes, one small step at a time. Each step adds just one or two new lines, there's a picture under every step so you can check your work, and wobbly lines are completely welcome — a slightly lopsided penguin just looks like it's leaning into the Antarctic wind.
I've taught this little tuxedoed friend to classrooms, to snow-day siblings, and to one grandparent who now signs every winter card with a tiny penguin in the corner. It works every time, because the penguin forgives everything. Sharpen a pencil, grab some paper, and let's meet the best-dressed bird in art.
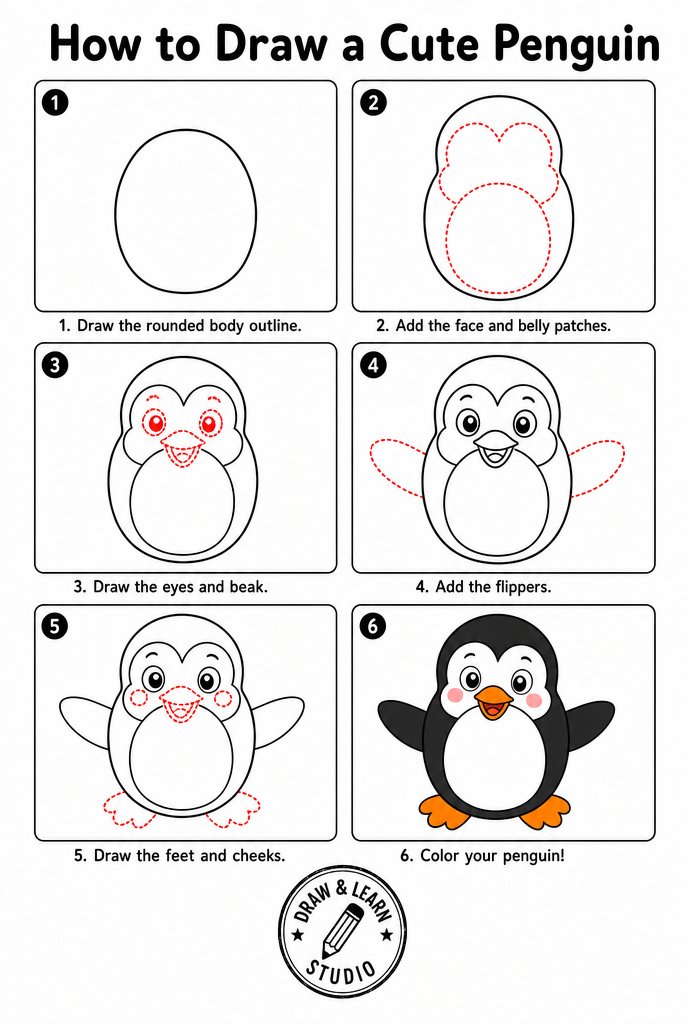
⏱️ Time: 15–20 minutes
⭐ Difficulty: beginner — great for kids 5+
✏️ Materials: pencil, eraser, paper, black and orange crayons or markers
Penguin drawing ideas: the 6 easy steps
Step 1 — Draw the body
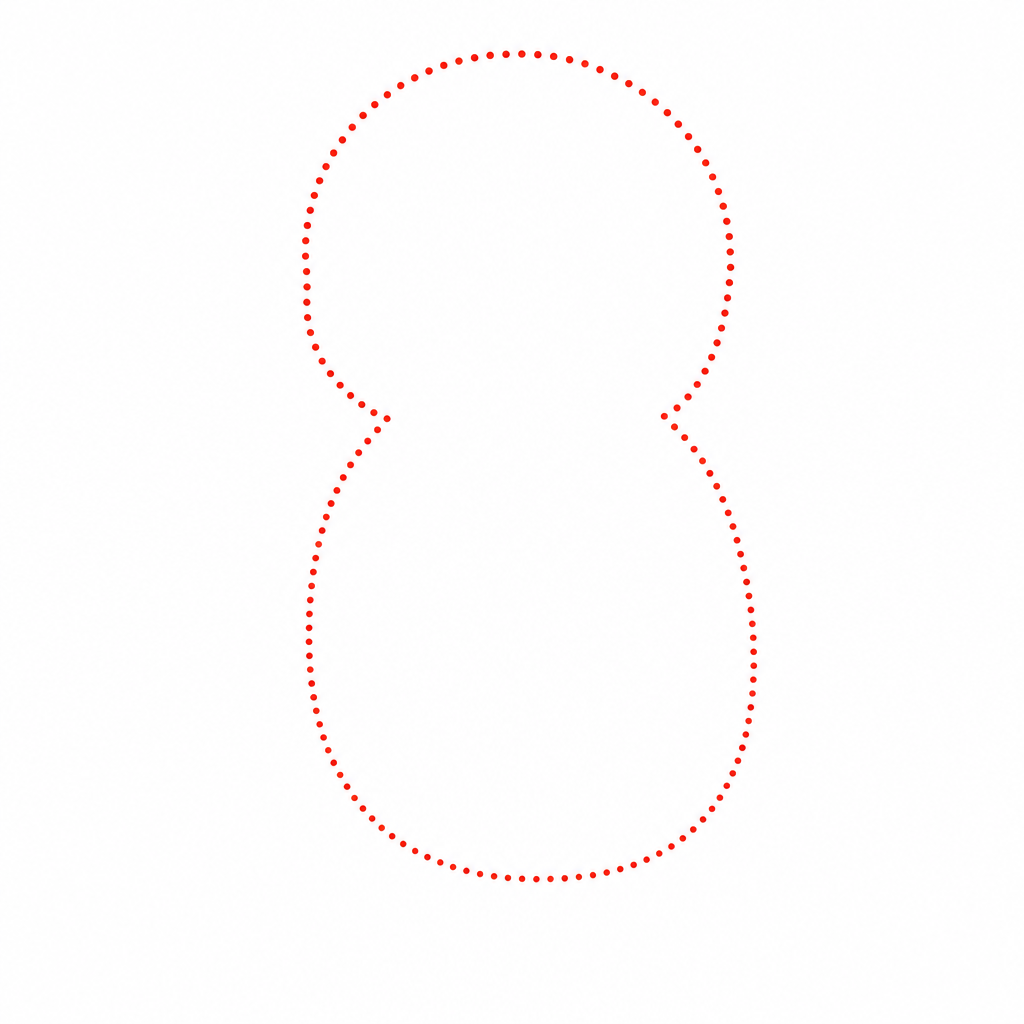
Start with one big, soft pear shape in the middle of your paper — a little narrower at the top where the head will be, and plump and round at the bottom where the tummy lives. Press lightly! This first line is scaffolding, and light lines are easy to fix, easy to erase, and easy to love.
Don't draw a separate circle for the head. This is the great penguin secret: the head and body are one continuous shape, like a bowling pin that ate a big lunch. The single smooth outline is what gives a cartoon penguin its famous cozy silhouette, and it means step one is already half the drawing.
Step 2 — Add the belly and face patch
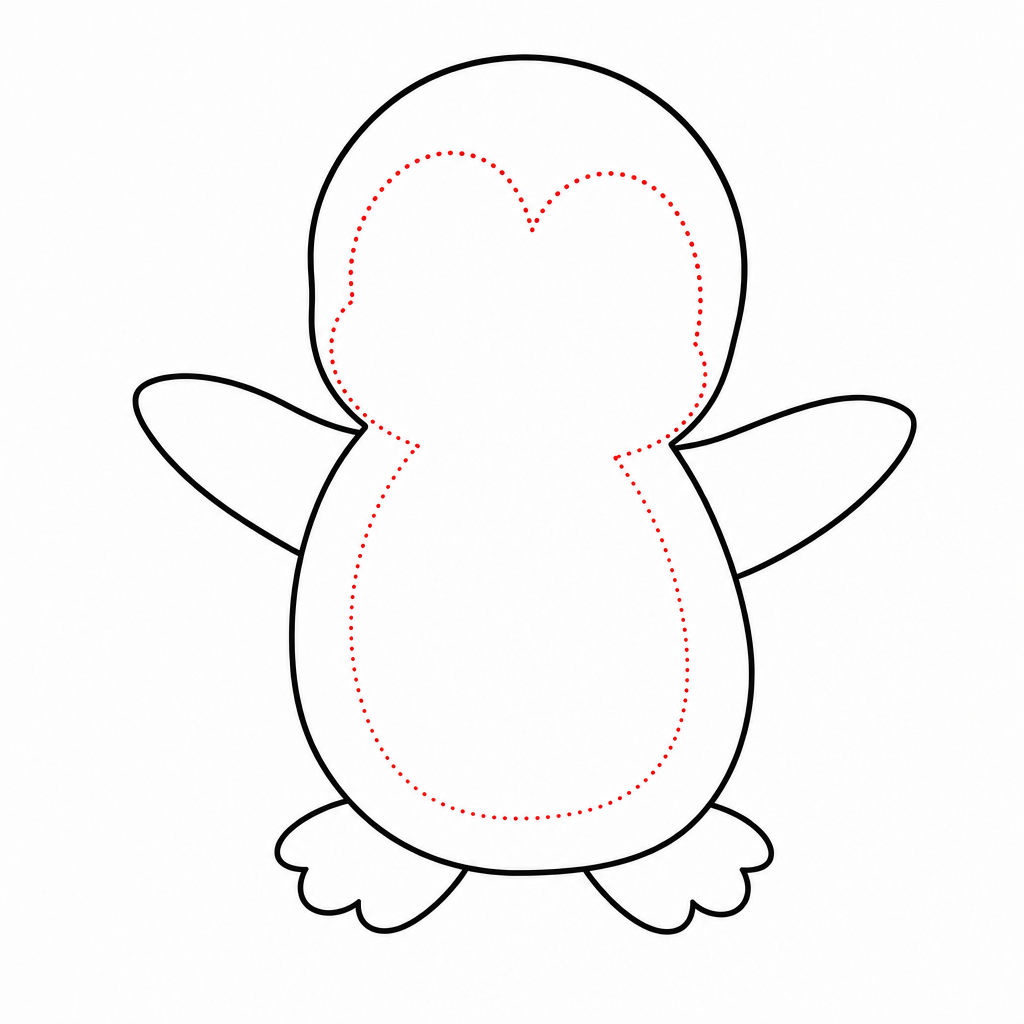
Now dress your penguin in its tuxedo. Inside the body outline, draw a big curved line that carves out the belly — start about two-thirds of the way up on one side, swoop down around the tummy, and come back up the other side. Everything inside this curve will stay white; everything outside will be black.
Then add the face patch: a soft rounded shape in the upper part of the body where the face will go. In many cartoon penguins the face patch and belly join into one continuous white front, and that's exactly the look we're going for — simple, smooth, and instantly penguin.
Step 3 — Draw the eyes and beak
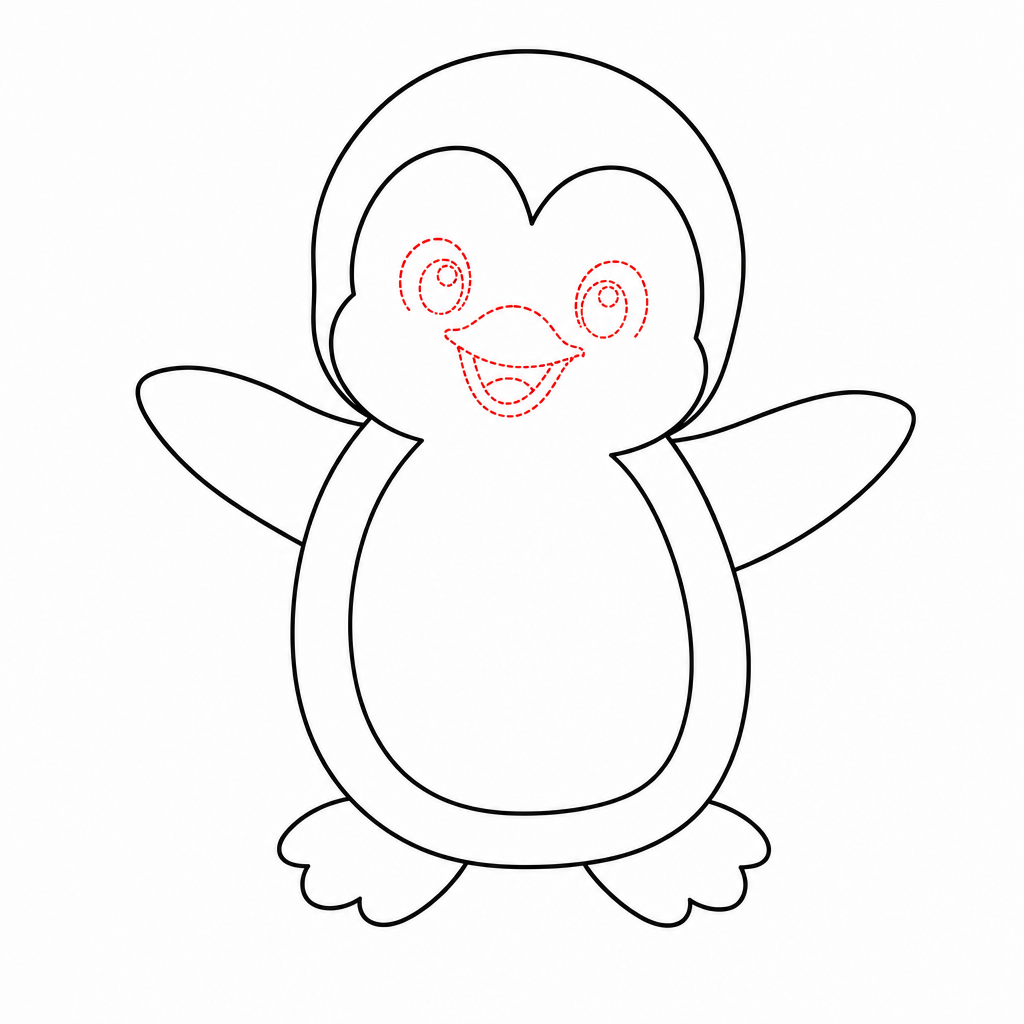
Time to give your penguin a face. Draw two round eyes inside the face patch, spaced comfortably apart. Fill them in dark, but leave a little white sparkle circle in each one — that tiny highlight is the difference between "cute cartoon" and "mysterious statue."
Between and just below the eyes, add the beak: a small, wide triangle with softly rounded corners, pointing downward. Small is the keyword here. A little triangle beak reads as sweet and chirpy; a long pointy one starts drifting toward "angry seagull," which is a different tutorial entirely.
Step 4 — Add the flippers
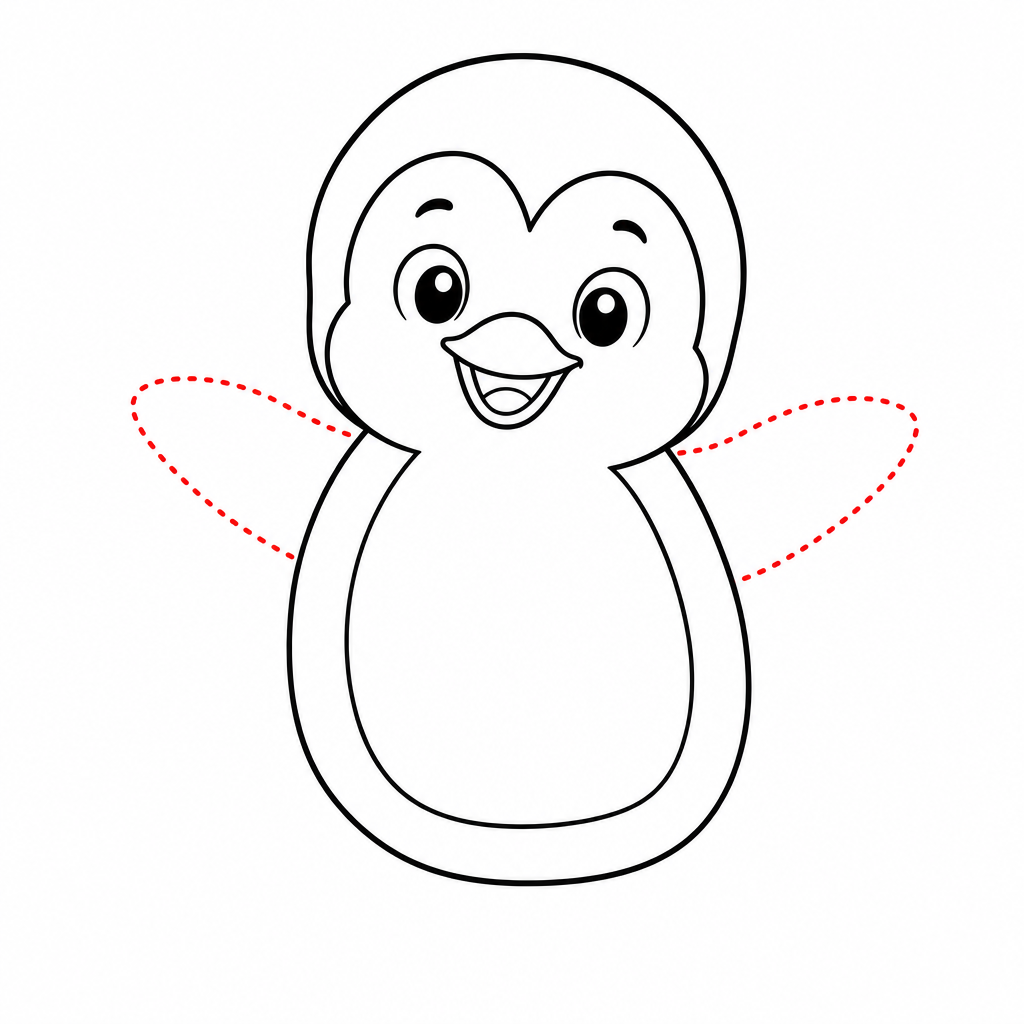
On each side of the body, draw a flipper: a slim, rounded shape like a flattened teardrop, starting up near the shoulder area and pointing down and slightly outward. Penguin flippers are small compared to the body — they should look a bit like the penguin is politely holding out its arms for a hug it isn't sure about.
Keep them simple: one smooth line out and one smooth line back, no feather details needed. If the two flippers don't match exactly, that's perfectly fine — real penguins hold their flippers at whatever jaunty angle they please, and so may yours.
Step 5 — Draw the feet and cheeks
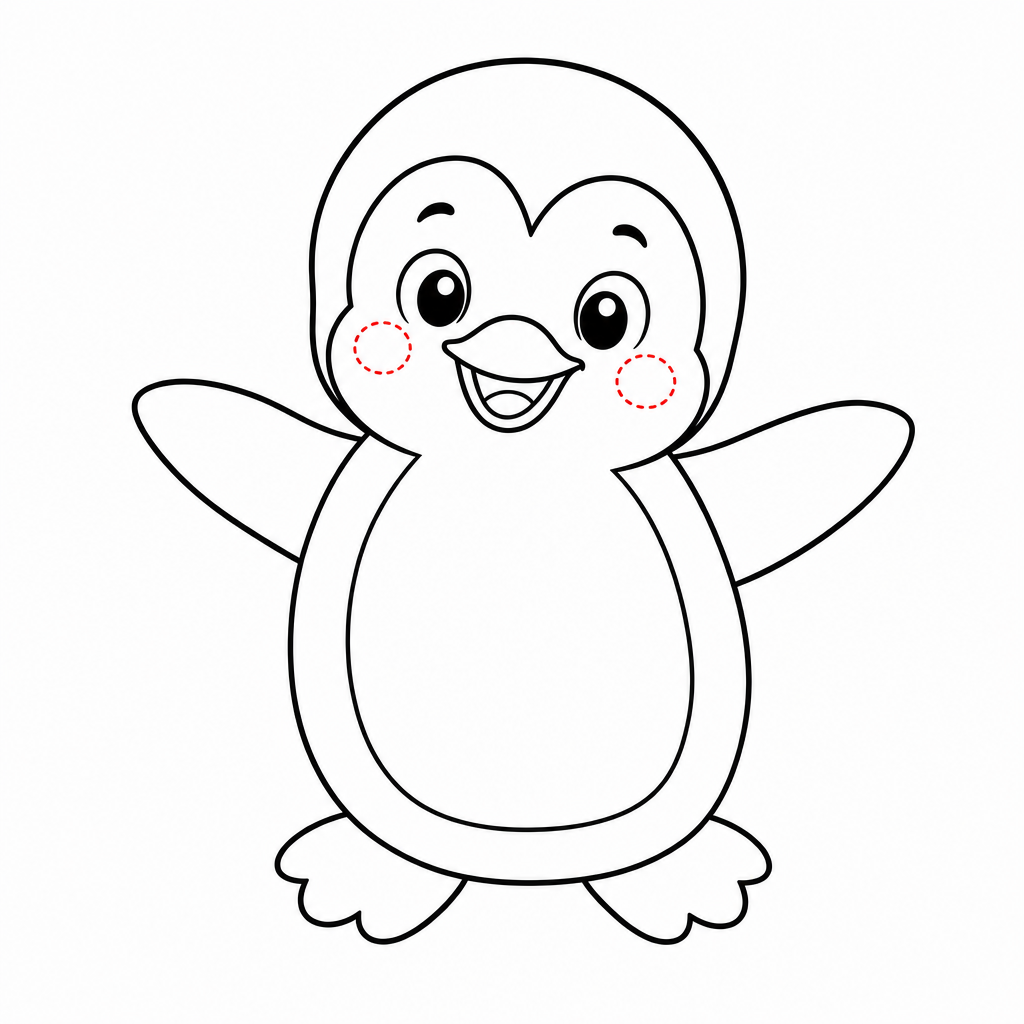
At the bottom of the body, draw two little webbed feet peeking out from under the tummy, pointing slightly outward like a small letter V. Each foot is just a rounded shape with two or three little bumps along the front edge for toes. The feet should look slightly too small for the body — that's not a mistake, that's the whole comedy of penguins.
Then add two small circles on the face, one under each eye, for rosy blush cheeks. They take four seconds and roughly double the cuteness of the entire drawing. This is the best value-for-effort step in the whole tutorial.
Step 6 — Finish and color
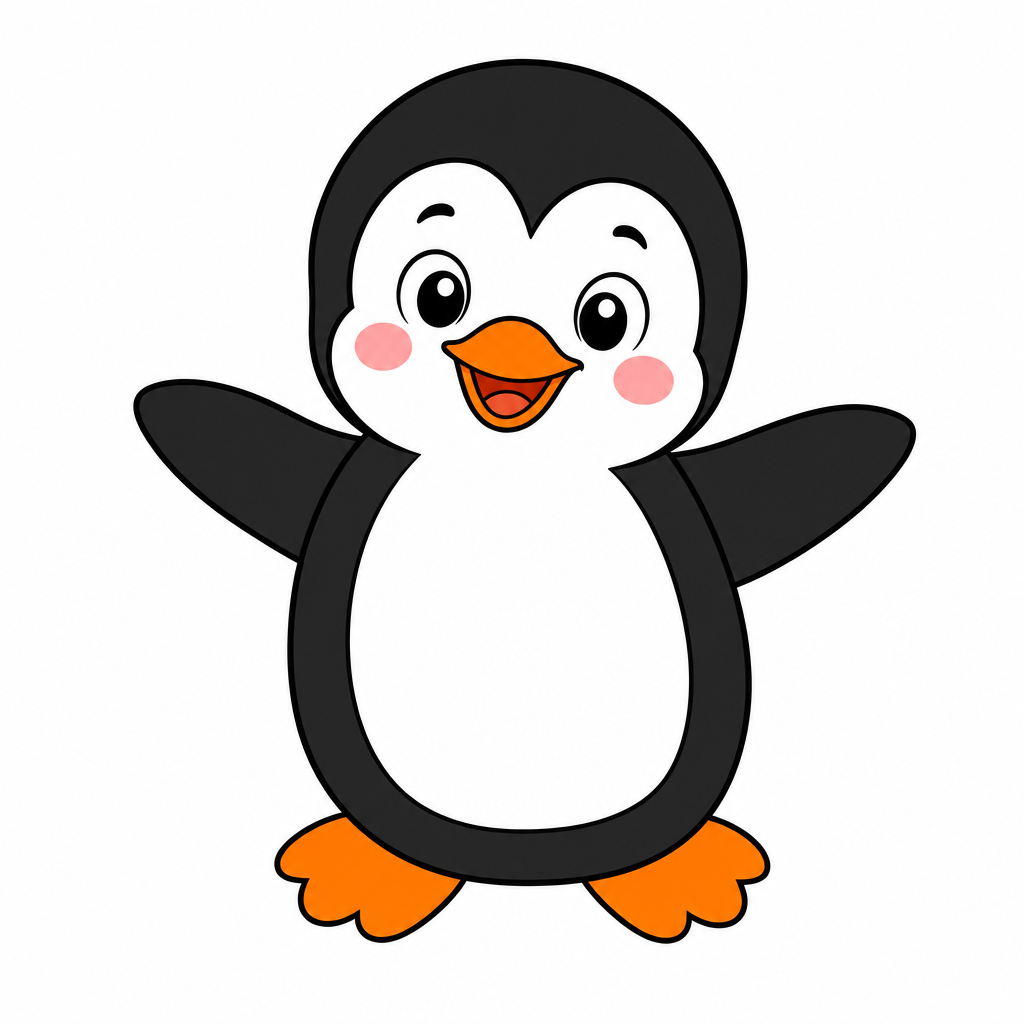
Go over your favorite lines with darker pencil pressure or a fine marker, then gently erase the leftover scaffolding — especially any body outline showing through the flippers and feet. Watch your penguin pop off the page as the construction lines disappear; this is the most satisfying ten seconds of the whole drawing.
Then color: black (or deep blue-black) for the back, head and flippers, snowy white for the belly and face, and bright cheerful orange for the beak and feet. Add pink cheeks, and if you like, a pale blue puddle of ice under those orange feet. Your penguin is now formally dressed and ready for any occasion — which, for penguins, is all of them.
Common mistakes to avoid
Drawing a separate head circle
A ball-on-a-ball penguin loses the famous smooth silhouette. Cartoon penguins have no visible neck — the head melts straight into the body in one continuous pear-shaped line.
If you've already drawn a separate head, don't panic: just connect the outside edges of head and body with two smooth curves and erase the lines between them. Instant tuxedo, no surgery required.
Making the beak too big
A big pointy beak is the fastest way to turn a cuddly penguin into a suspicious-looking seabird. The beak should be one of the smallest shapes in the whole drawing — a modest little triangle, wider than it is long.
If your beak came out huge, round off its tip and add bigger cheeks and eyes around it. Enlarging the friendly features rebalances the face without erasing anything.
Skinny belly syndrome
A narrow white front makes the penguin look like it's wearing a business tie instead of a tuxedo. The white belly should take up most of the penguin's front — wide at the tummy and sweeping generously up to the face.
The fix is happy news: just redraw the belly curve further out and color over the old line with black. The bigger the belly, the friendlier the bird.
Troubleshooting
"My penguin looks like an egg with a face"
You're closer than you think — penguins genuinely are egg-shaped. What sells the bird are the extras: make the flippers clearly visible at the sides, let the orange feet peek out at the bottom, and be sure the black back and white belly have a crisp boundary. Egg + flippers + orange details = penguin, every time.
"The flippers look like stubby arms"
Angle them! Flippers that hang straight down read as arms. Tilt them slightly away from the body, make them a touch flatter and pointier than an arm would be, and keep them attached high on the sides. Even a small outward angle makes the penguin look ready to toboggan off on its belly.
"My two feet look different sizes"
Nobody has ever noticed a penguin's mismatched feet, including other penguins. If it truly bothers you, enlarge the smaller foot with one extra curve rather than erasing the bigger one — adding is always cleaner than removing. Then move on to the coloring, which is where the real glory lives.
Key takeaways
- A penguin is one big pear shape — head and body in a single smooth line, no neck.
- The white belly and face patch make the tuxedo: draw them big and generous.
- Keep the beak small and triangular — small beak, maximum friendliness.
- Flippers attach to the outline and angle slightly outward, like tiny sleeves.
- Too-small webbed feet and blush cheeks are correct and adorable.
- Draw light until step 6 — then dark lines, black back, white front, orange details.
FAQ
What age is this penguin drawing tutorial for? Kids 5 and up can follow along with a little help, and children 7+ usually manage all six steps independently. A cartoon penguin is one big friendly shape with a few simple additions, which makes it a perfect first bird to draw.
What colors do I need for a penguin? Just three: black for the back and head, white (or blank paper) for the belly, and orange for the beak and feet. A touch of pink for the cheeks makes it extra cute.
Why does my penguin look like an egg? It should — a little! Penguins really are egg-shaped. The flippers, the face patch, and the orange beak and feet are what turn the egg into a bird, so make those features clear and your penguin will read perfectly.
Can I draw a baby penguin instead? Absolutely. Make the body rounder and shorter, the eyes bigger, and color the body soft grey instead of black. Baby emperor penguins are fluffy grey with a dark head and white face — same steps, different colors.
Keep drawing! 🐧
If your young artist is hooked, our step-by-step drawing book is the top pick in our studio — 320 animals taught in the same easy 6-step style as this tutorial. Pair it with a chunky set of washable markers and a spiral sketchpad (spiral bindings lie flat, which little hands love), and quiet afternoons take care of themselves.
Get the book on AmazonYou did it! One pear-shaped body, two tiny flippers and a pair of ridiculous orange feet later, there's a penguin beaming up at you in full formal wear. Stick it on the fridge, draw it a snowy friend tomorrow, and remember: every artist you've ever admired started exactly like this — one round, happy, impeccably dressed penguin at a time.
More tutorials: All tutorials · How to draw an axolotl · How to draw a duck · How to draw a sloth