How to draw an axolotl — easy step by step drawing ideas
If you're collecting axolotl drawing ideas, congratulations on excellent taste — you've picked the smiliest animal in the entire animal kingdom. Learning how to draw an axolotl is secretly one of the easiest lessons in our studio, because an axolotl is really just a happy pink blob wearing a feathery crown. There are no tricky proportions, no complicated legs, and absolutely no wrong way to draw a creature that already looks like a cartoon in real life.
Here's my promise: by the end of this tutorial you'll have a genuinely adorable axolotl built from soft, simple shapes. We go one small step at a time, each step builds gently on the last, and there's a picture under every step so you can check your drawing as you go. Wobbly lines are welcome here — on an axolotl, wobbly just looks extra squishy.
I've taught this little pink friend to classrooms, to rainy-day cousins, and to one six-year-old who now draws axolotls on every birthday card her family receives. Everyone leaves smiling, because it's scientifically impossible to draw an axolotl's face without smiling back. Sharpen a pencil, find some paper, and let's meet the happiest amphibian in art.
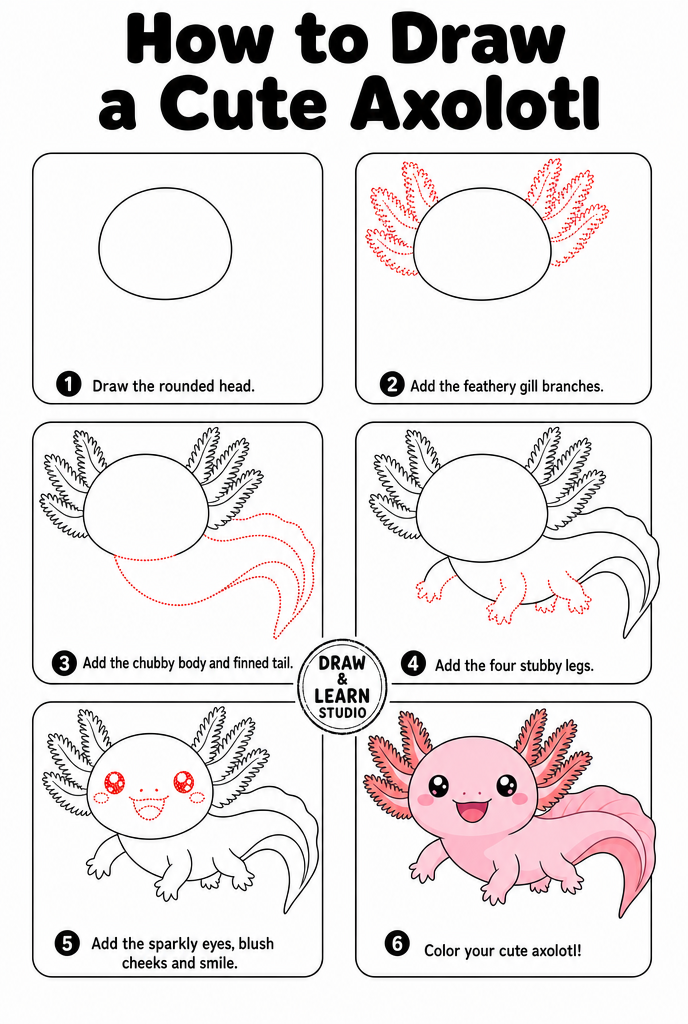
⏱️ Time: 15–20 minutes
⭐ Difficulty: beginner — great for kids 5+
✏️ Materials: pencil, eraser, paper, pink and coral crayons or markers
Axolotl drawing ideas: the 6 easy steps
Step 1 — Draw the head
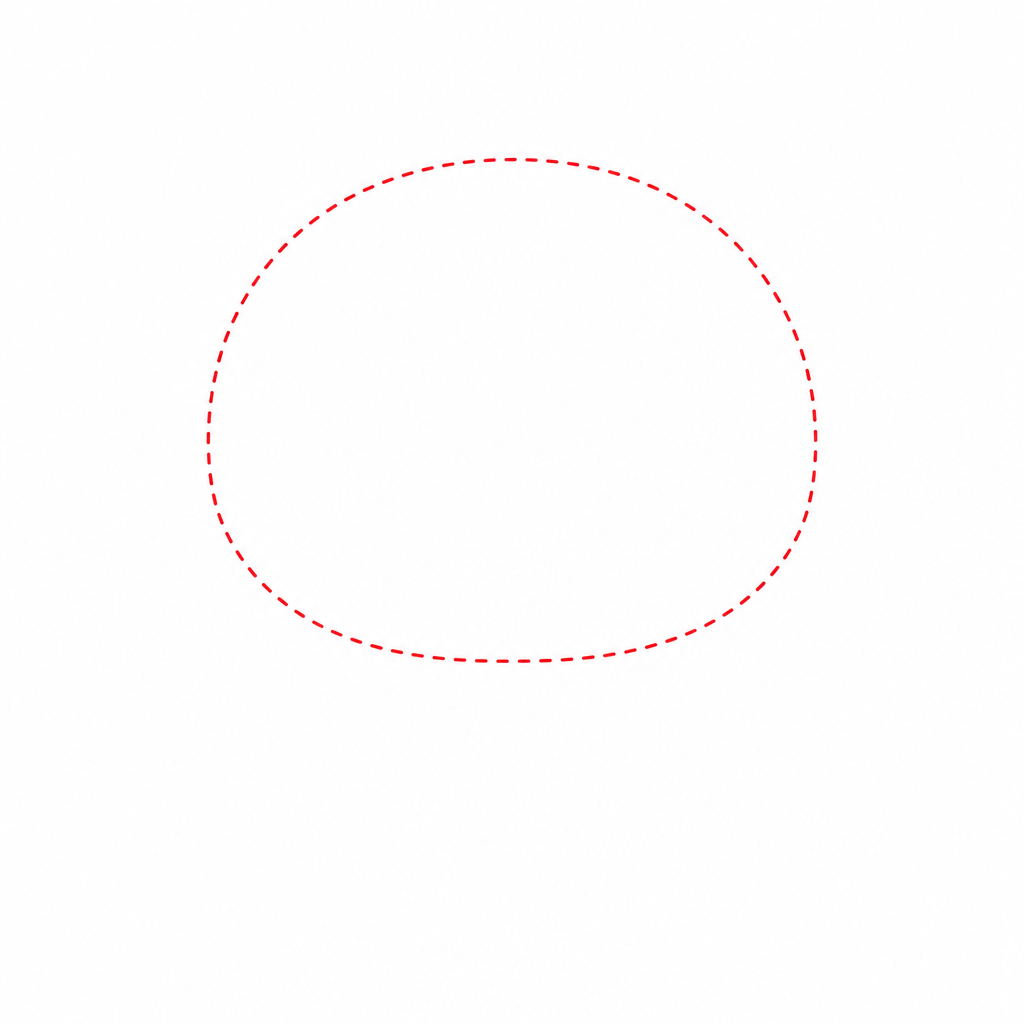
Start with a big rounded shape in the upper middle of your paper — wider than it is tall, like a marshmallow lying on its side or a very relaxed pebble. Press lightly! This is scaffolding, and some of it will be erased later. Axolotl heads are broad and flat-ish on top, so resist the urge to draw a tall circle.
Make it generous. Like all our cute drawings, the head does most of the work, and axolotls in particular are basically 60% head, 40% everything else. Leave paper on both sides of the head too — the famous frilly gills need room to spread out in the next step, and they'd be very disappointed to get squished against the edge.
Step 2 — Add the famous frilly gills
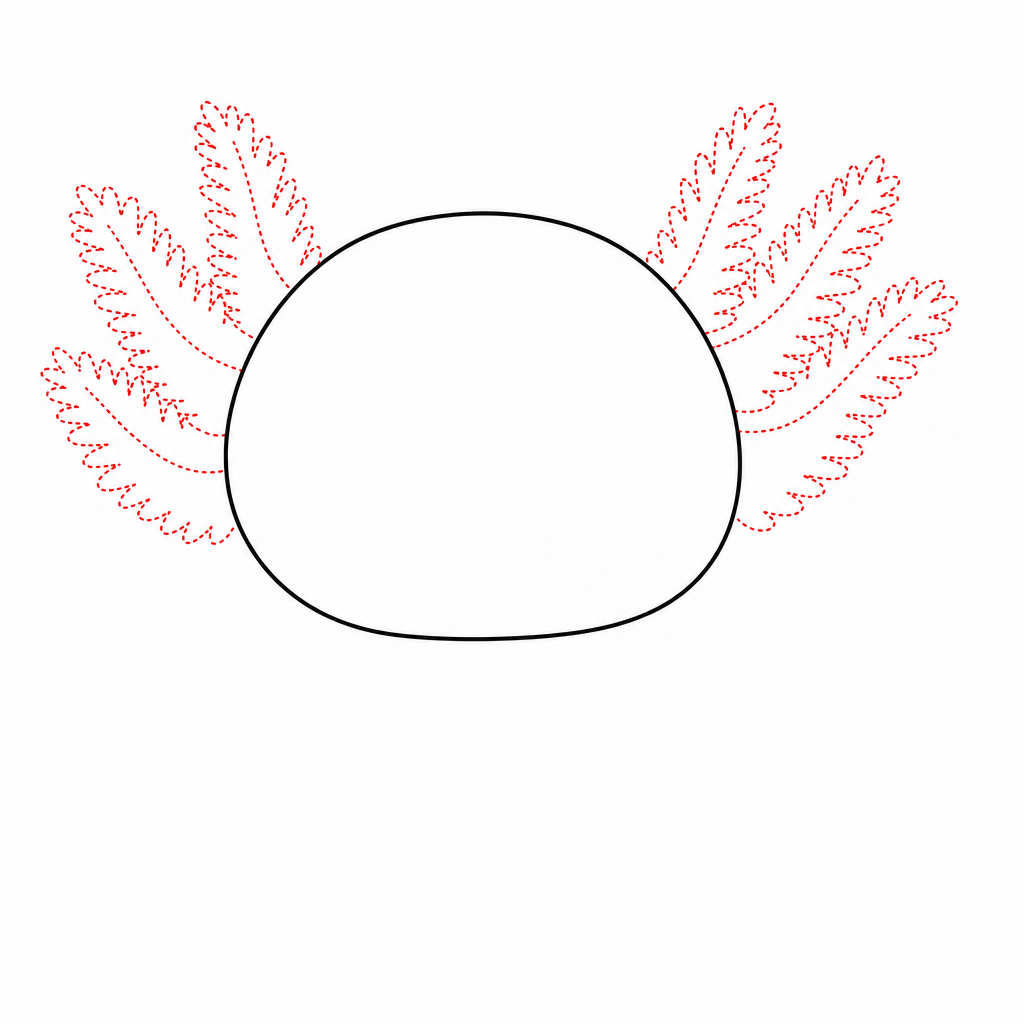
Now for the axolotl's signature feature: the external gills. On each side of the head, draw three branches sticking out and slightly upward — one high, one in the middle, one low. Think of each branch as a little stick with a fringe: draw a short curved line out from the head, then add tiny feathery strokes along it, like a soft bottle brush or a tiny fern.
Don't aim for perfect symmetry. Real axolotl gills are floaty and a little chaotic, drifting in the water like party streamers. If one branch is longer or fluffier than its neighbor, that's not a mistake, that's realism. The only rule is three per side — six total — because that's what makes an axolotl instantly recognizable.
Step 3 — Draw the body and tail
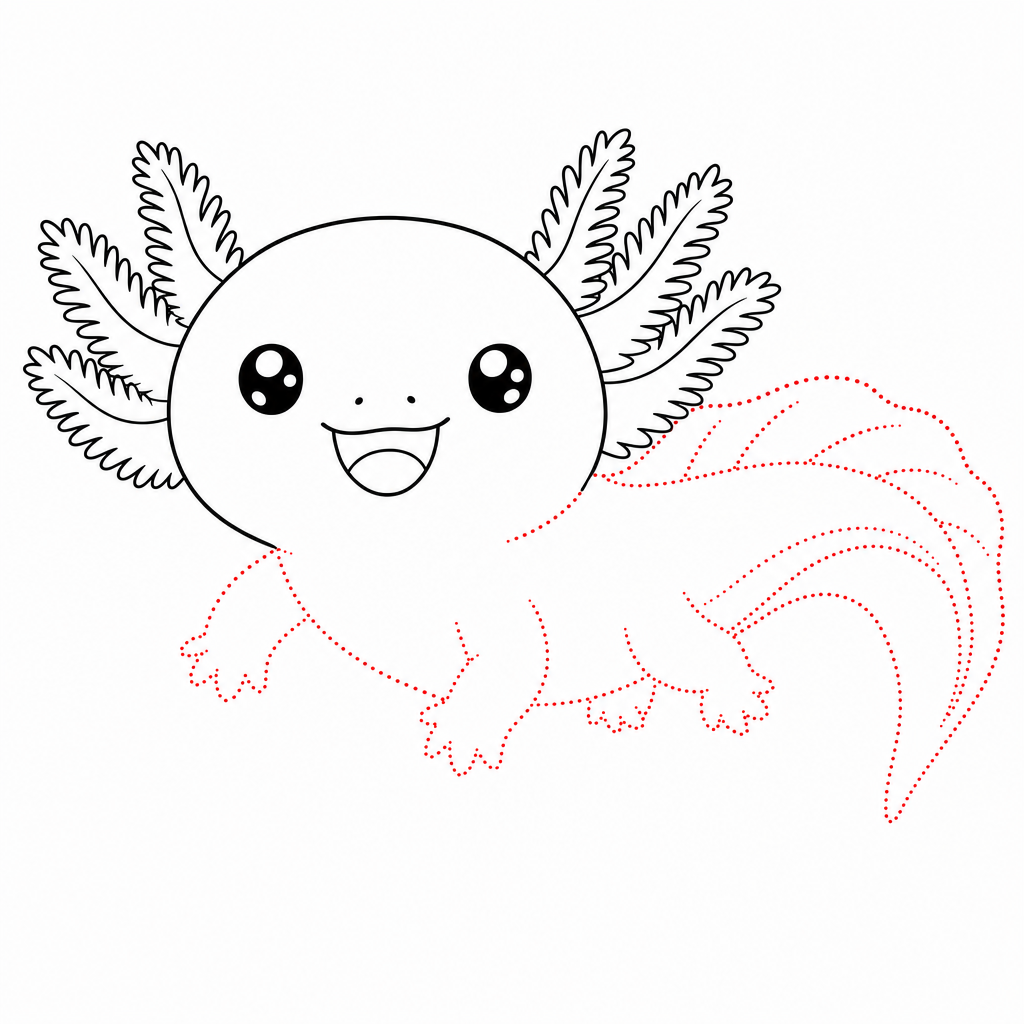
From the bottom of the head, draw a soft, chubby body that curves off to one side and gradually narrows into a long tail. There's no neck and no shoulder — an axolotl flows from head to tail in one smooth, pudding-like line, which makes this step wonderfully forgiving. Let the tail curl gently upward or around, ending in a rounded tip.
Then give the tail its fin: a slightly wavy line running along the top edge of the tail and around the tip, like the crust on a pie. Axolotls have a soft fin ridge that runs down their back and around the tail, and that one wavy line adds an amazing amount of "definitely an axolotl, definitely underwater" energy for almost no effort.
Step 4 — Add the stubby legs
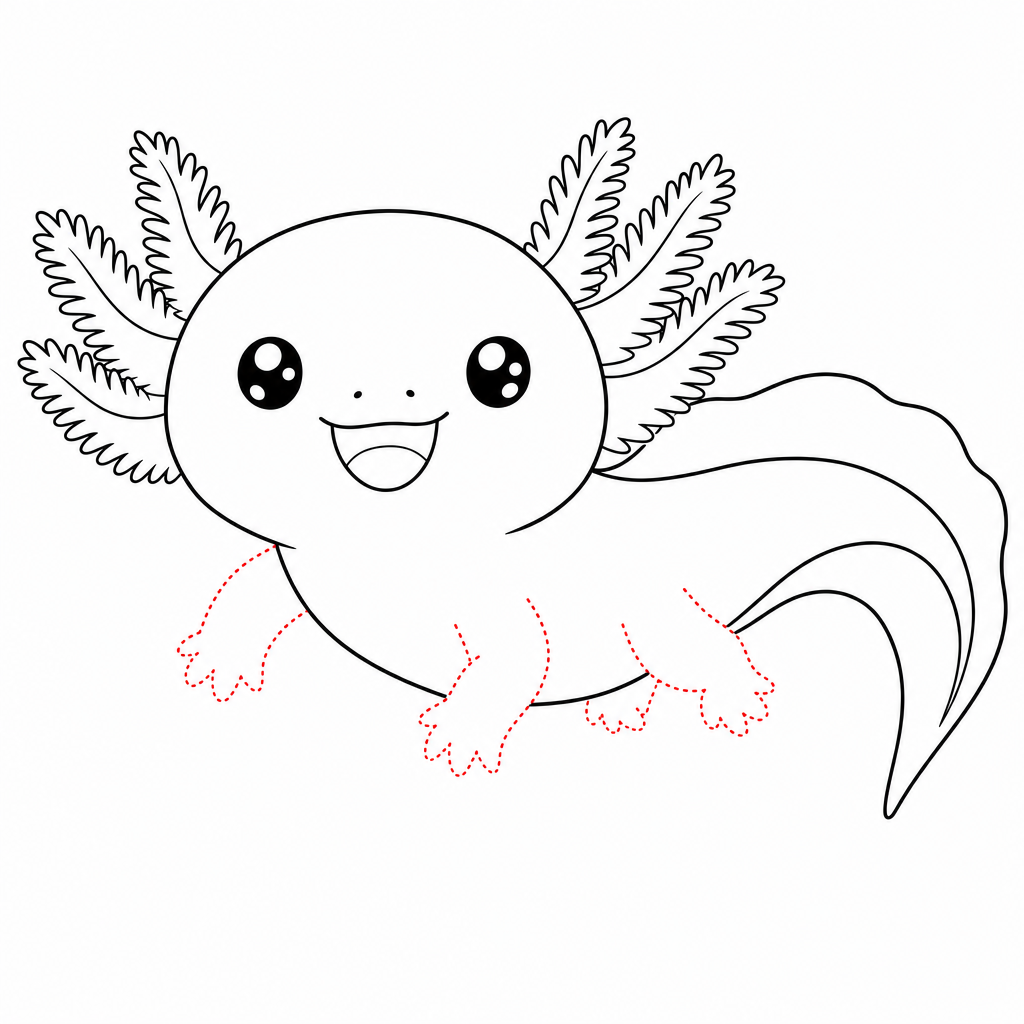
Axolotl legs are a beginner's dream: four short, stubby little arms and legs, drawn as simple rounded tubes. Add two at the front of the body and two further back near where the tail begins. They should look far too small to carry the body — that's correct, and it's most of the charm. Real axolotls mostly drift and dawdle; their legs are more decorative than practical.
Finish each leg with tiny toes: three or four little bumps, like the edge of a mitten. Front feet get their bumps pointing forward, back feet pointing slightly outward. Don't overthink toes — at this size they're just bumps, and bumps are enough.
Step 5 — Give it that famous smile
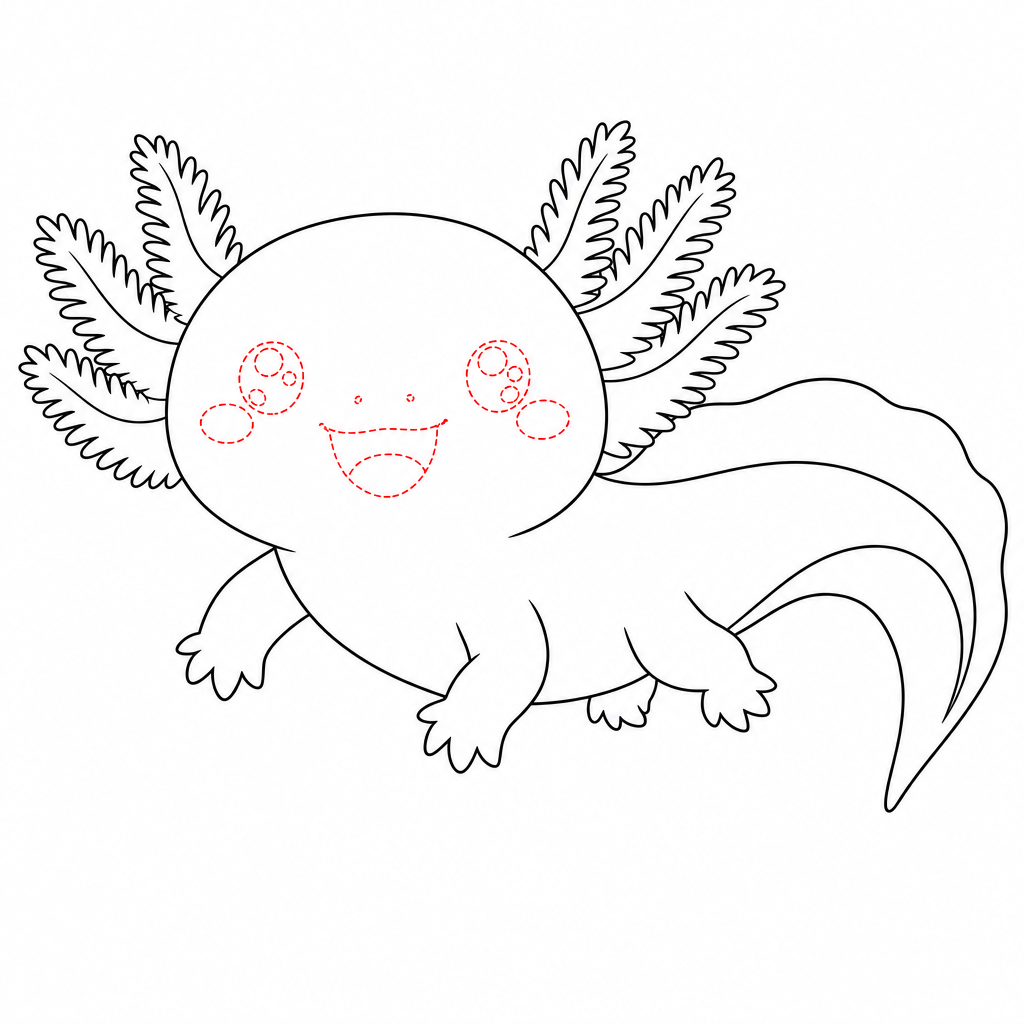
Time for the best part. Draw two round eyes wide apart on the head — much wider apart than you'd place them on a cat or puppy, almost at the edges of the face. Fill them in dark but leave a small white sparkle circle in each. Axolotl eyes are little and bright, and the wide spacing is a big part of the friendly, slightly-silly look.
Then the smile: one long, wide curve stretching across the face from cheek to cheek, gently turned up at both ends. This is the most famous smile in the amphibian world — make it big and confident. Finish with two blush circles under the eyes, and your axolotl is officially beaming at you.
Step 6 — Finish and color
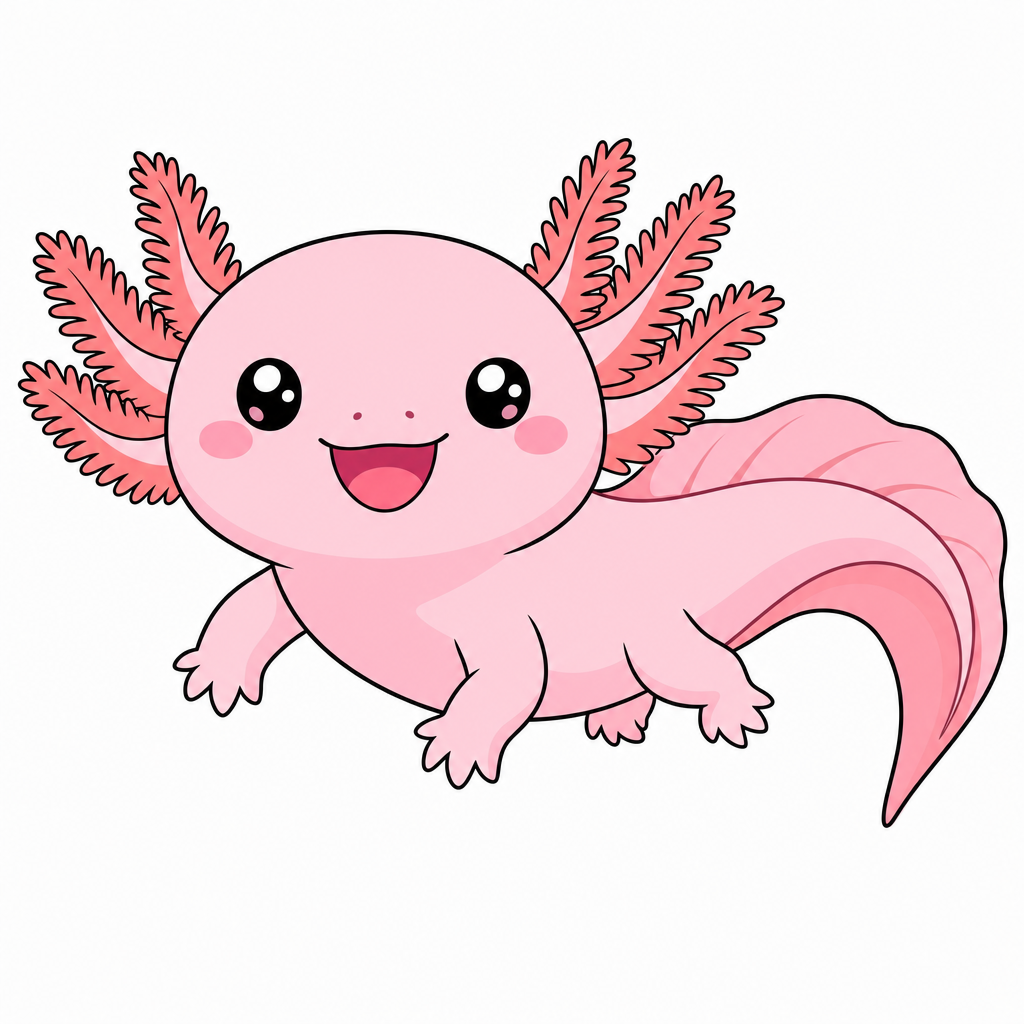
Go over your favorite lines with darker pencil pressure or a fine marker, and gently erase the leftover scaffolding — especially any head lines hiding behind the gills and the body line under the tail fin. Watch the axolotl pop off the page as the construction lines disappear. This is the most satisfying ten seconds of the whole tutorial.
Then color! The classic look is soft pastel pink all over with darker coral-pink gills — color each feathery branch a warm rosy coral so the crown really glows. Pink cheeks, a slightly lighter tummy, and maybe a few pale spots along the back finish the look. Golden, white, lavender or wild brownish-gray axolotls are all real and all beautiful, so follow your crayon box wherever it leads. A few small blue bubbles floating nearby say "happily underwater" with three seconds of effort.
Common mistakes to avoid
Forgetting the gills (or making them tiny)
The feathery gills are the whole identity of this animal. Leave them out and you've drawn a very nice salamander; make them tiny and your axolotl looks like it's having a bad hair day. Three bold branches per side, drawn with pride.
If your finished gills feel too small, don't erase — just extend each branch outward and add more fringe. Gills are one of the few features you can enlarge after the fact with zero damage.
Drawing a tall, round head
A circle head pushes your axolotl toward frog territory. Axolotl heads are wide and low — clearly wider than they are tall, with the eyes far apart near the edges.
Before you draw the eyes in step 5, glance at your head shape. If it turned out too round, widen the smile and move the eyes further apart — both tricks visually flatten the face and bring back the axolotl look.
Pressing too hard too early
Dark, heavy lines in steps 1–3 are nearly impossible to erase cleanly, and this drawing depends on scaffolding disappearing at the end. The first steps should be whisper-light — light enough to erase with two swipes.
Save the confident dark strokes for step 6, when you know exactly which lines deserve them. Light lines are drafts; dark lines are decisions.
Troubleshooting
"My axolotl looks like a lizard"
Two fixes: gills and smile. Lizards have neither six feathery head-branches nor a cheek-to-cheek grin. Make the gills bigger and fluffier, stretch the smile wider, and round off anything pointy — axolotls contain no sharp angles whatsoever.
"The gills look like sticks, not feathers"
Add more fringe strokes, and angle them along each branch like a fir tree rather than straight out like a comb. Short, quick, slightly curved strokes read as feathery; long straight ones read as twigs. Coloring the gills a deeper coral than the body also softens them instantly.
"My lines are wobbly"
On most animals wobbly lines need forgiving; on an axolotl they're basically the house style — everything about this creature is soft, squishy and slightly irregular. Draw each curve a little faster to smooth it out, and remember that your "mistake" probably just made the axolotl look huggier.
Key takeaways
- An axolotl is a happy blob in a feathery crown — the easiest cute animal in our studio.
- The head is wide and low, never a tall circle, with eyes spaced far apart.
- Three feathery gill branches per side are non-negotiable — they ARE the axolotl.
- Body, tail and fin flow in one smooth line; there's no neck to worry about.
- Stubby too-small legs with bump-toes are correct and adorable.
- Draw light until step 6 — then dark lines, big smile, pink everything.
FAQ
What age is this axolotl drawing tutorial for? Kids 5 and up can follow along with a little help, and children 7+ usually manage all six steps on their own. Axolotls are one of the most forgiving animals to draw — every shape is soft and round, so wobbles just look extra squishy.
What colors should an axolotl be? The classic pet axolotl is soft pink with darker coral-pink gills, but wild axolotls are brownish gray, and golden, white and even lavender ones exist. Any pastel color you love will look wonderful.
What exactly are the frilly things on its head? Those are external gills — three feathery branches on each side that axolotls use to breathe underwater. They look like a fancy headdress, and they're the single most important feature to include in your drawing.
My axolotl looks like a lizard. Help? Check the gills and the smile. Without the six feathery gill branches, an axolotl reads as a plain salamander or lizard. Make the gills big and proud, keep the head wide, and give it that famous wide smile — the frills and the grin are what make an axolotl an axolotl.
Keep drawing! 🌸
If your young artist is hooked, our step-by-step drawing book is the top pick in our studio — 320 animals taught in the same easy 6-step style as this tutorial. Pair it with a chunky set of washable markers and a spiral sketchpad (spiral bindings lie flat, which little hands love), and quiet afternoons take care of themselves.
Get the book on AmazonYou did it! One wide smile, six feathery gills and four stubby legs later, there's an axolotl beaming up at you from the page. Stick it on the fridge, draw it a bubbly underwater friend tomorrow, and remember: every artist you've ever admired started exactly like this — one round, pink, impossibly happy axolotl at a time.
More tutorials: All tutorials · How to draw a butterfly · How to draw a dragon · How to draw a cat