How to draw a butterfly — easy step by step drawing ideas
If you're collecting butterfly drawing ideas for a rainy afternoon, you've fluttered to exactly the right page. Learning how to draw a butterfly is one of the friendliest lessons in our studio, because a butterfly is really just one little oval wearing four petal-shaped wings — and petals are something every beginner can draw on the first try.
Here's my promise: by the end of this tutorial you'll have a genuinely charming butterfly built from shapes you already know. We go one small step at a time, each step builds gently on the last, and there's a picture under every step so you can check your drawing as you go. No art degree required, no special supplies, no pressure.
I've taught this exact sequence at kitchen tables, in classrooms, and once at a garden birthday party where the guest of honor insisted every butterfly needed a crown. (They did, and it was wonderful.) So sharpen a pencil, find any piece of paper, and let's draw the roundest, happiest butterfly you've ever seen.
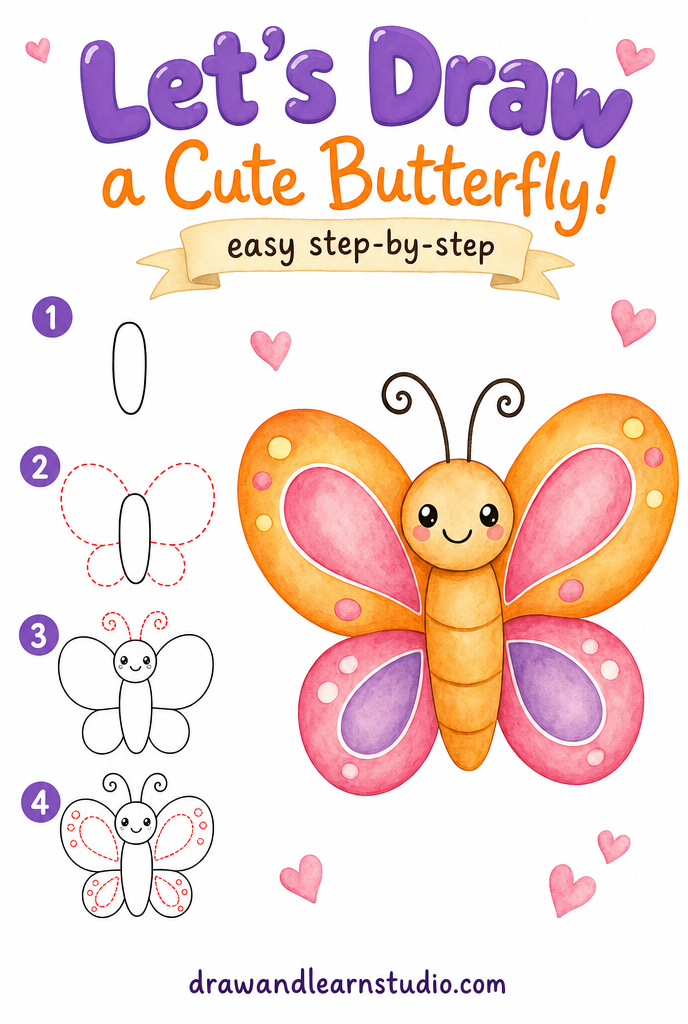
⏱️ Time: 15–20 minutes
⭐ Difficulty: beginner — great for kids 5+
✏️ Materials: pencil, eraser, paper, orange and pink crayons or markers
Butterfly drawing ideas: the 6 easy steps
Step 1 — Draw the body
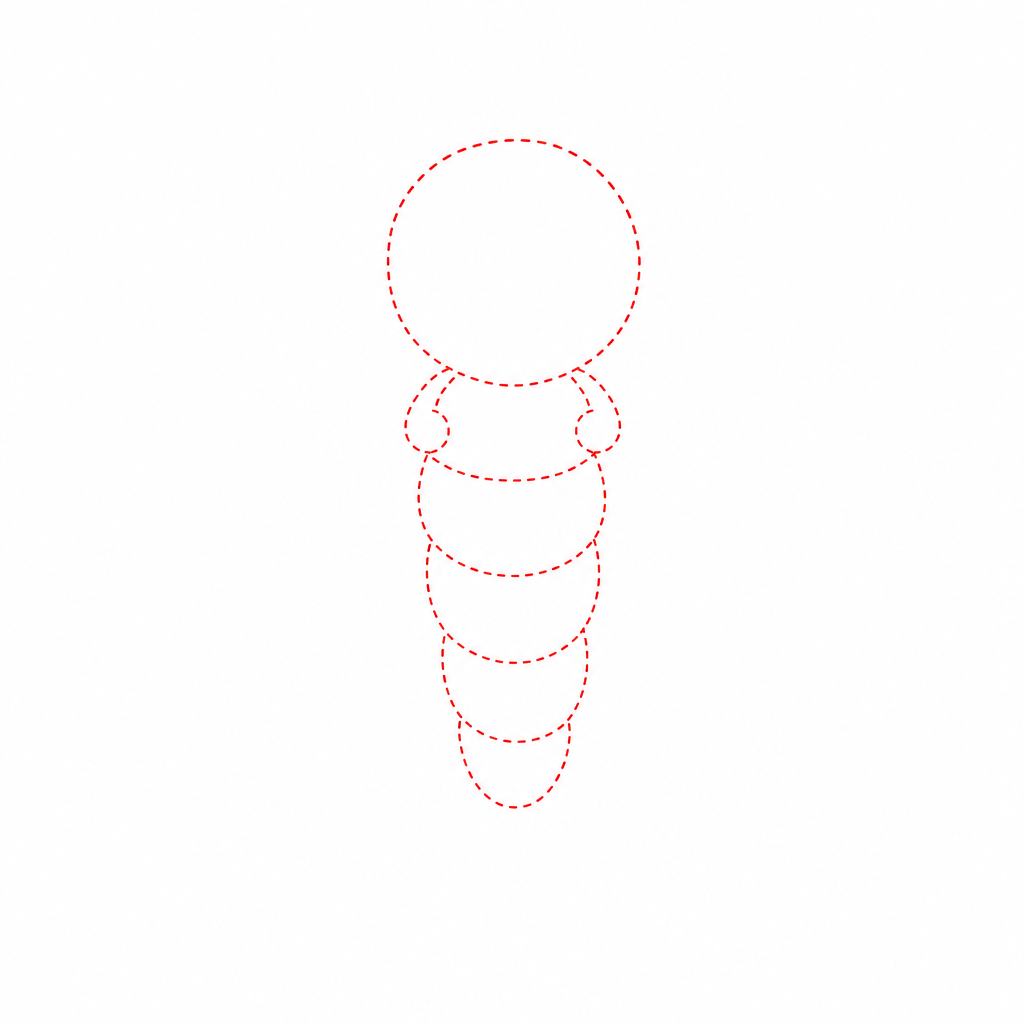
Start with a small chubby oval in the middle of your paper, standing upright like a friendly little peanut. Press lightly! This oval is the butterfly's body, and everything else attaches to it, so give it room — the wings that come next will need lots of space on both sides.
Keep the body small on purpose. In cute cartoon drawing, the wings do all the showing off, and a small body makes the wings look big and dramatic. If your oval leans a little or bulges a bit, that's completely fine — butterflies come in every shape, especially hand-drawn ones.
Step 2 — Add the upper wings
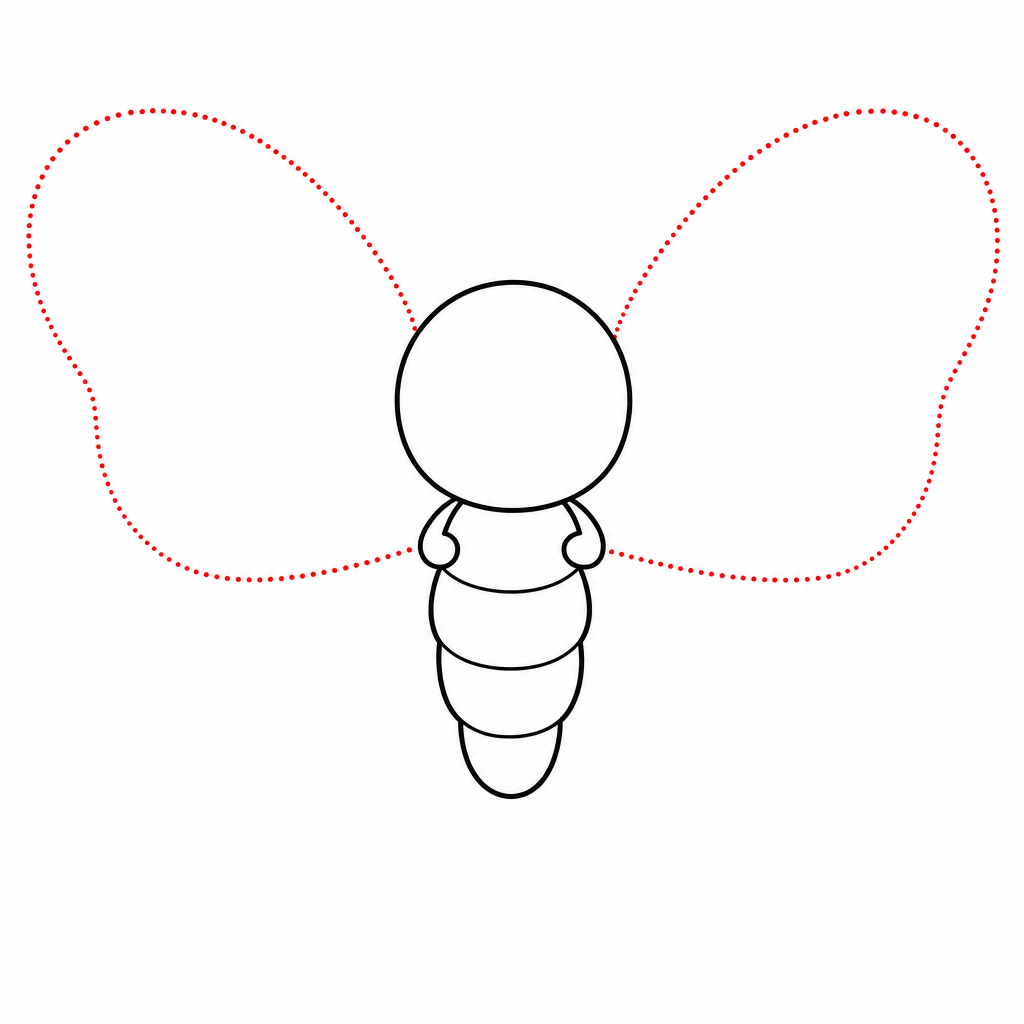
Now the fun part. Starting near the top of the body, draw a big rounded wing sweeping up and out to one side — think of a flower petal or a big soft ear. Then do the same on the other side. The two upper wings should be the biggest shapes in the whole drawing, easily bigger than the body.
Don't worry about making them identical. Draw one, look at it, then draw the second one at the same height, aiming for "cousins" rather than "twins." Starting both wings from nearly the same point on the body is the real secret to a balanced butterfly.
Step 3 — Add the lower wings
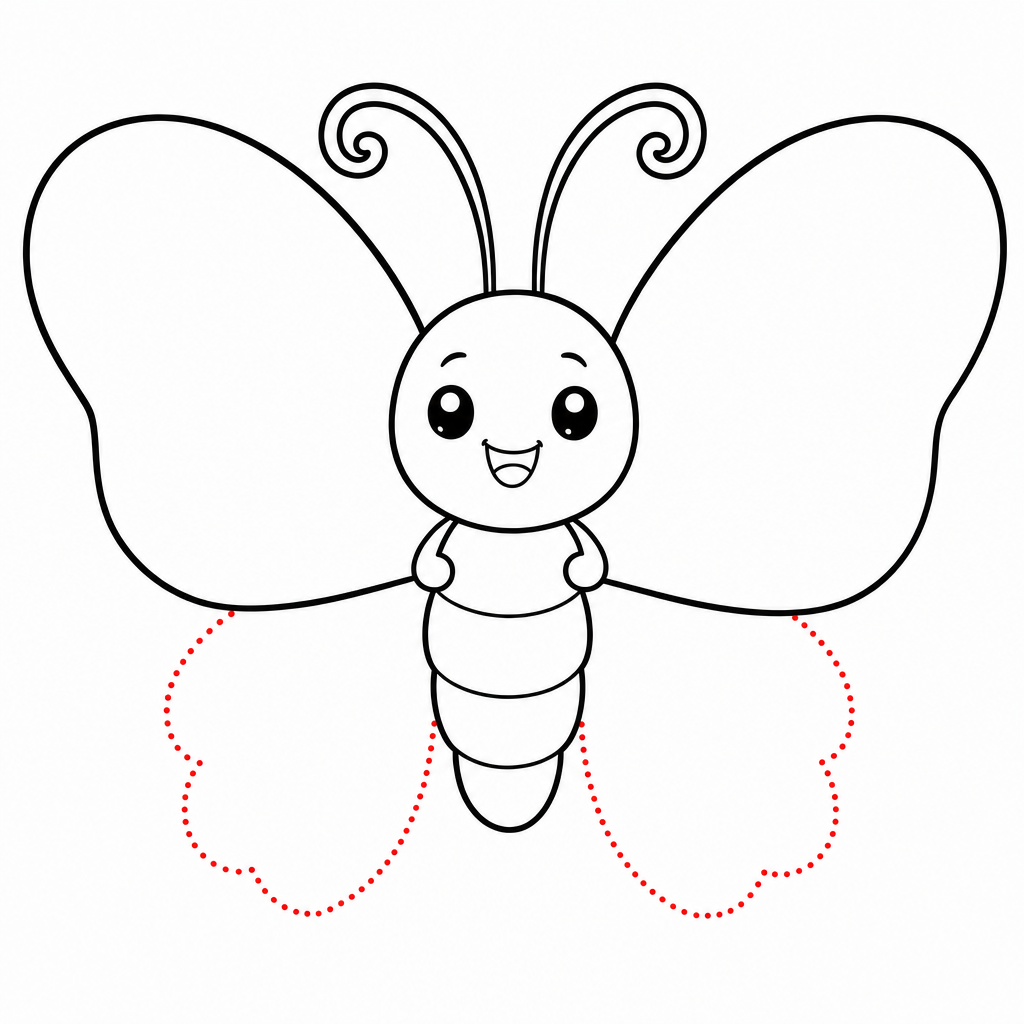
Underneath each upper wing, add a smaller rounded wing, like a little sibling standing close. The lower wings start where the upper wings meet the body and curve down and slightly outward. Together, the four wings should make a soft butterfly-shaped cloud around the tiny body.
Let the lower wings overlap the upper ones just a little where they meet — real wings layer, and that tiny overlap instantly makes your drawing look more alive. If the shapes touch or gap a bit unevenly, the decorations in step 5 will happily cover for you.
Step 4 — Add the antennae and face
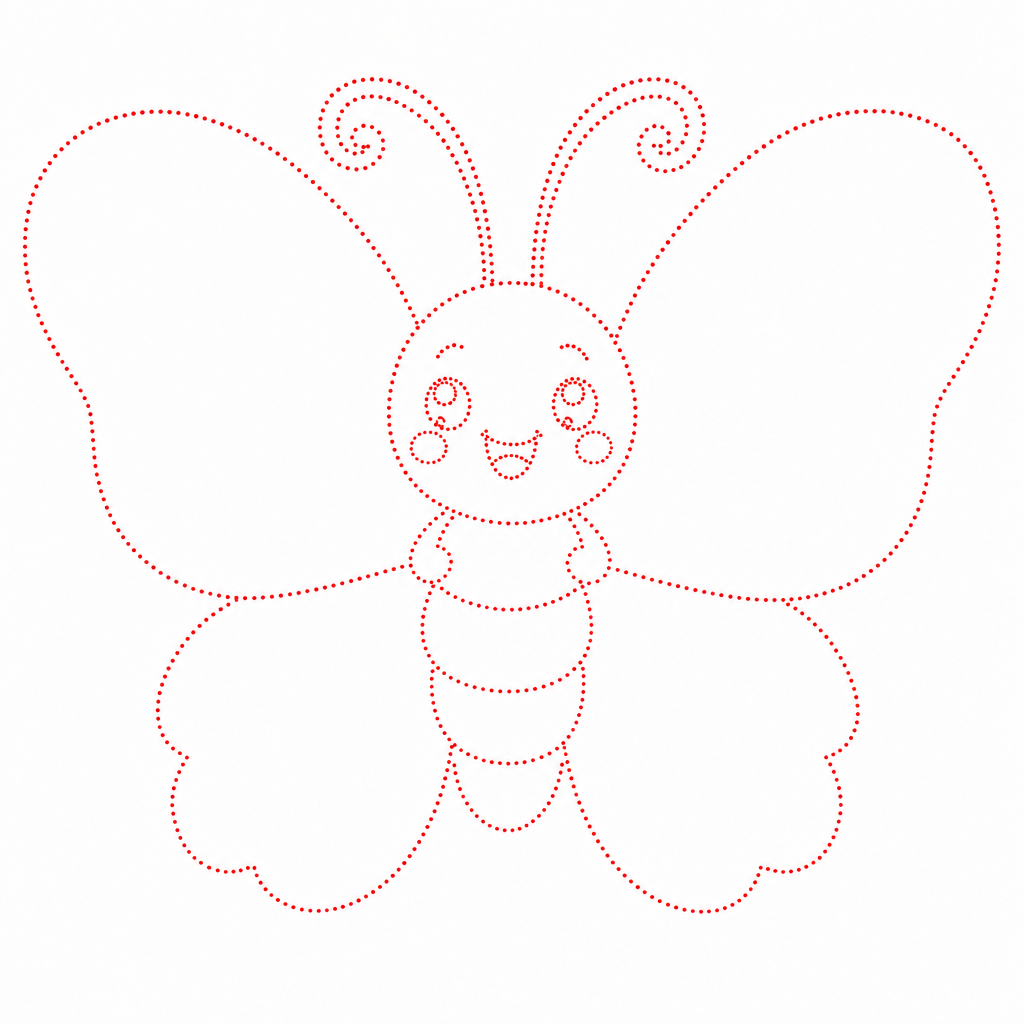
From the top of the body, draw two thin lines curving up and away from each other, each ending in a tiny curl — like two party streamers. Antennae with curled tips read as "delighted"; straight stick antennae read as "antenna inspection day." Curls win every time.
Then give your butterfly a face: two big round eyes high on the body, a tiny smiling mouth below them, and two rosy blush circles on the cheeks. Fill the eyes in dark but leave a little white sparkle in each — that sparkle is the difference between "drawing of a butterfly" and "butterfly that just spotted a flower."
Step 5 — Decorate the wings
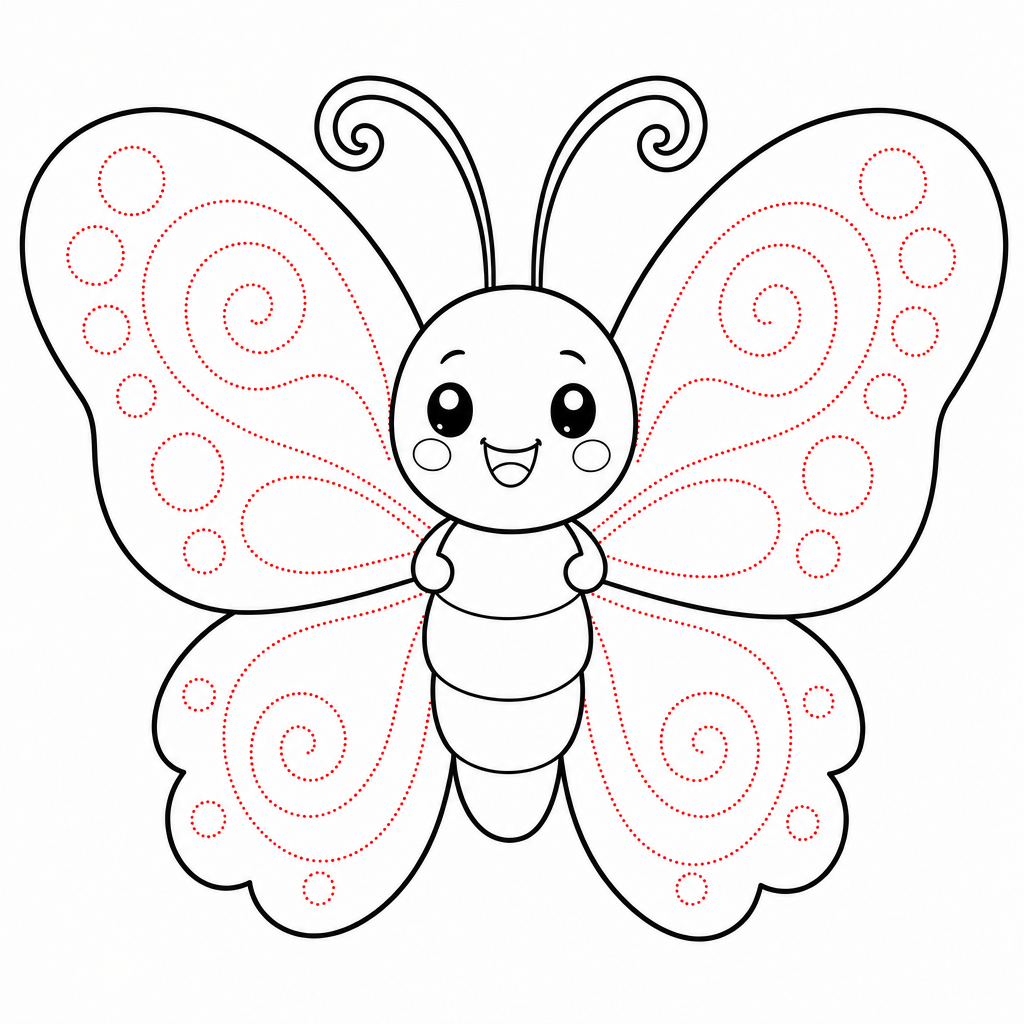
Time to dress the wings. Add a big dot in the middle of each upper wing, a smaller dot or two below it, and a little swirl or curved line near each wingtip. Whatever you draw on the left wing, echo on the right wing — close enough is perfect.
This is also the step where your butterfly becomes yours. Hearts, stars, stripes, tiny flowers, zigzags — every pattern is correct as long as it repeats on both sides. Some of the best butterflies to come out of our studio wore polka dots on one pair of wings and lightning bolts on the other.
Step 6 — Finish and color
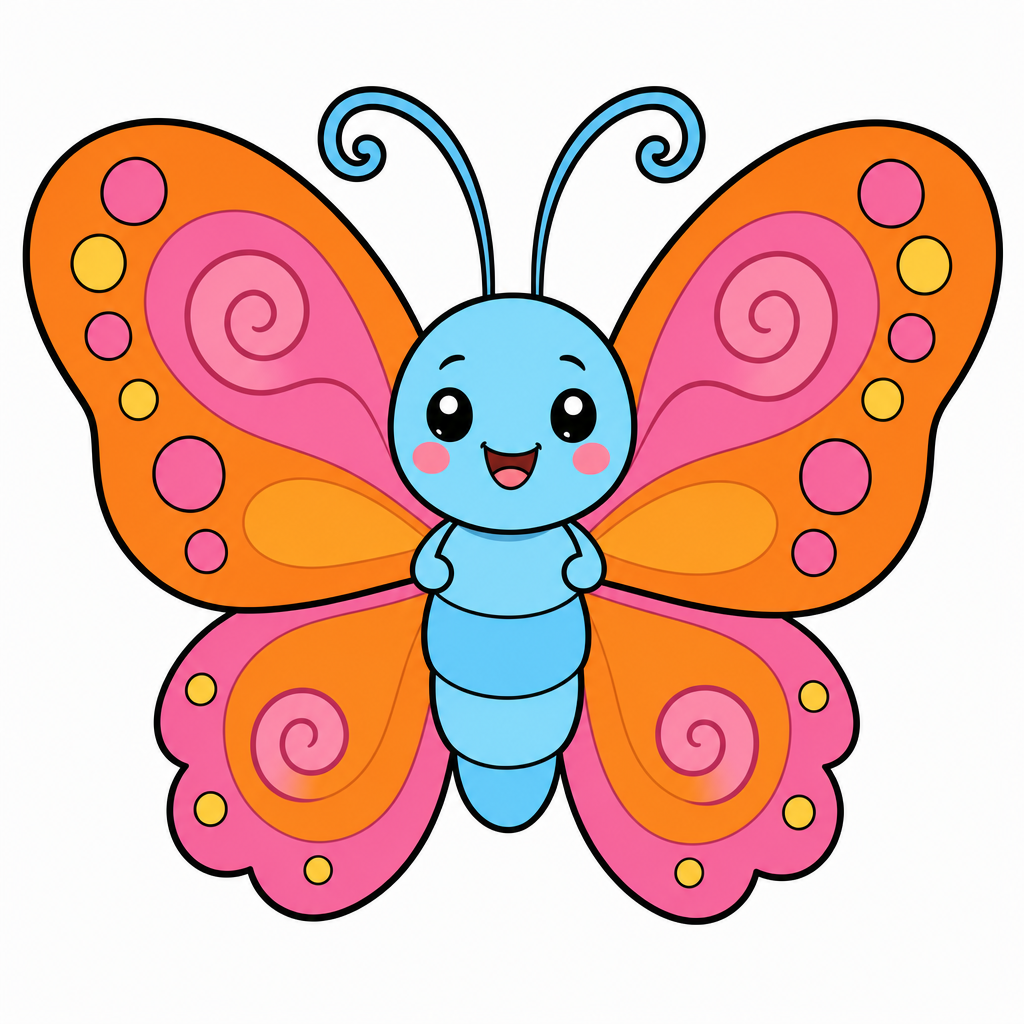
Go over your favorite lines with darker pencil pressure or a fine marker, and gently erase the leftover scaffolding — especially where the wings overlap the body. This is the most satisfying ten seconds of the tutorial: the construction lines vanish and suddenly there's a butterfly resting on your paper.
Then color! Orange and pink wings with a soft blue body is our studio classic, but purple, yellow, rainbow stripes or a completely imaginary galaxy butterfly are all equally correct. Coloring the wing patterns a different shade than the wings makes the whole drawing pop from across the room.
Common mistakes to avoid
Making the body too big
A big body with small wings reads as "beetle in a cape." The butterfly look comes from tiny body, enormous wings — the body should be the smallest shape on the page.
If your body came out large, don't start over: just draw the wings bigger to match. Butterflies are forgiving that way — the wings set the scale, and everything else follows.
Drawing the wings from the wingtip inward
Wings drawn from the outside in tend to miss the body entirely and float beside it. Always start each wing where it attaches to the body and sweep outward — takeoff, not landing.
If a wing did drift loose, connect it with a short line at the base and let the step 5 decorations distract the eye. Nobody audits a butterfly's shoulders.
Pressing too hard too early
Dark, heavy lines in steps 1–3 are nearly impossible to erase cleanly, and this drawing depends on scaffolding disappearing at the end. The first steps should be whisper-light — light enough to erase with two swipes.
Save the confident dark strokes for step 6, when you know exactly which lines deserve them. Light lines are drafts; dark lines are decisions.
Troubleshooting
"My wings don't match"
They don't need to — no real butterfly's do. But if one wing is much bigger, lightly draw a dot where the smaller wing's tip should reach to match the big one, then re-trace the smaller wing out to the dot. Measuring with dots beats erasing every time.
"My butterfly looks like a moth"
Round the wingtips and brighten the patterns. Moth-look usually comes from pointy, droopy wings and empty wing space. Big dots, cheerful swirls and up-swept wings bring the flutter right back.
"My lines are wobbly"
Every artist's lines are wobbly at pencil-speed; confidence comes from repetition, not talent. Try drawing each curve a little faster — slow, careful strokes wobble more because your hand micro-corrects the whole way. A wobbly wing edge just looks like it's mid-flap.
Key takeaways
- A butterfly is one small oval and four petal shapes — nothing a beginner hasn't drawn before.
- Tiny body, enormous wings: that's the whole butterfly formula.
- Start every wing at the body and sweep outward, doing each step on both sides before moving on.
- Curled antennae and a sparkle in the eyes carry all the charm.
- Patterns only need to roughly repeat left-to-right — "cousins, not twins."
- Draw light until step 6 — scaffolding lines must erase cleanly at the end.
FAQ
What age is this butterfly drawing tutorial for? Kids 5 and up can follow along with a little help, and children 7+ usually manage all six steps on their own. Because a butterfly is symmetrical, it's also a sneaky little lesson in balance and proportion for older beginners.
How do I make both sides of the butterfly match? Draw the body first, then treat it as your mirror line. Do each wing step on both sides before moving on — left upper wing, right upper wing, then down. Nearly-matching wings look wonderful; perfectly matching wings are for printers.
What materials do we need? Just a pencil, an eraser and paper. Orange, pink and blue crayons make the final step sing, but a pencil-only butterfly is still a lovely butterfly.
My wings look like circles. Is that wrong? Not at all — round wings are the cute-style secret. Real butterfly wings have points and angles, but rounded petal shapes read as friendly and are far easier to repeat on both sides.
Keep drawing! 🦋
If your young artist is hooked, our step-by-step drawing book is the top pick in our studio — 320 animals taught in the same easy 6-step style as this tutorial. Pair it with a chunky set of washable markers and a spiral sketchpad (spiral bindings lie flat, which little hands love), and quiet afternoons take care of themselves.
Get the book on AmazonYou did it! One little oval, four petal wings and a pair of party-streamer antennae later, there's a butterfly sunning itself on your page. Stick it on the fridge, draw it a flower to land on tomorrow, and remember: every artist you've ever admired started exactly like this — one round, happy, slightly wobbly butterfly at a time.
More tutorials: All tutorials · How to draw a ladybug · How to draw a hamster · How to draw a duck